Unlike Windows and macOS, the Chrome operating system’s recycle bin or trash can is hidden by default. Files deleted before enabling the recycle bin are permanently deleted and not recoverable. If you have a new Chromebook, you should unhide its recycle bin.
This tutorial will show you how to add a trash folder to your Chromebook’s file manager. You’ll also learn other ways to restore deleted files on your Chromebook.

How to Enable Chromebook Recycle Bin
Follow the steps below to enable the hidden recycle bin on your Chromebook through Google Chrome’s Flags menu.
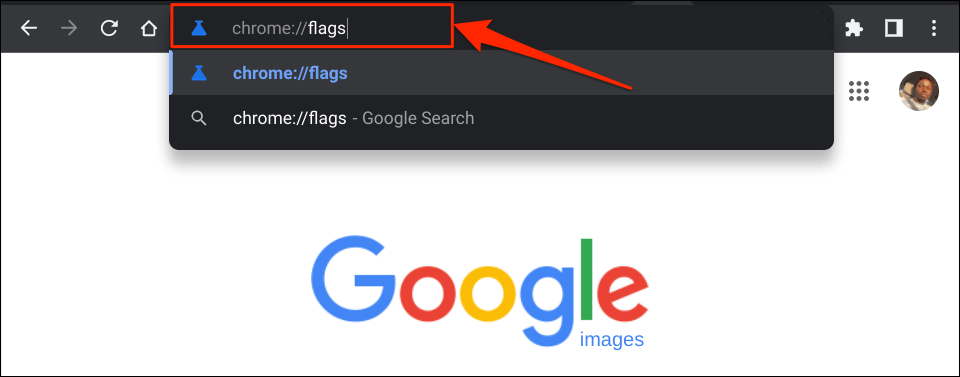
- Open Chrome, type chrome://flags in the address bar, and press Enter.

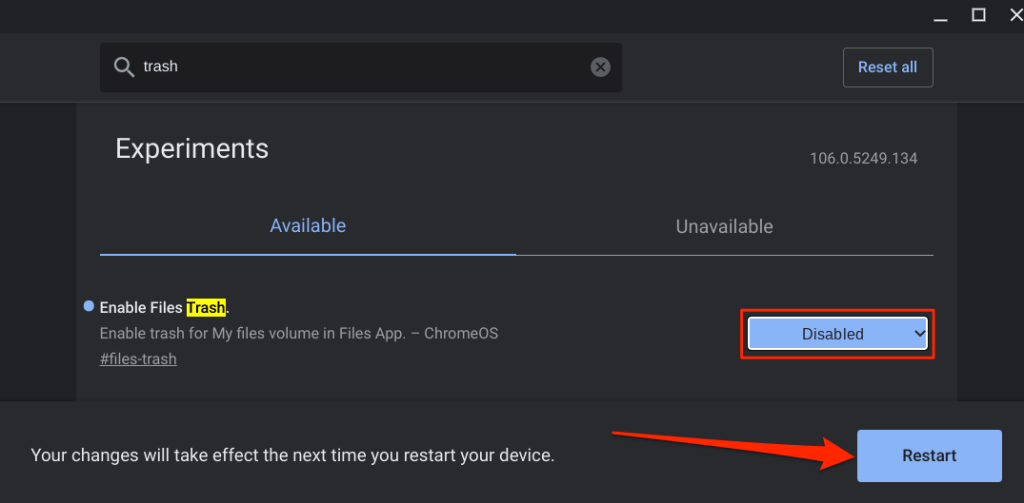
- Type trash in the Flags search box.
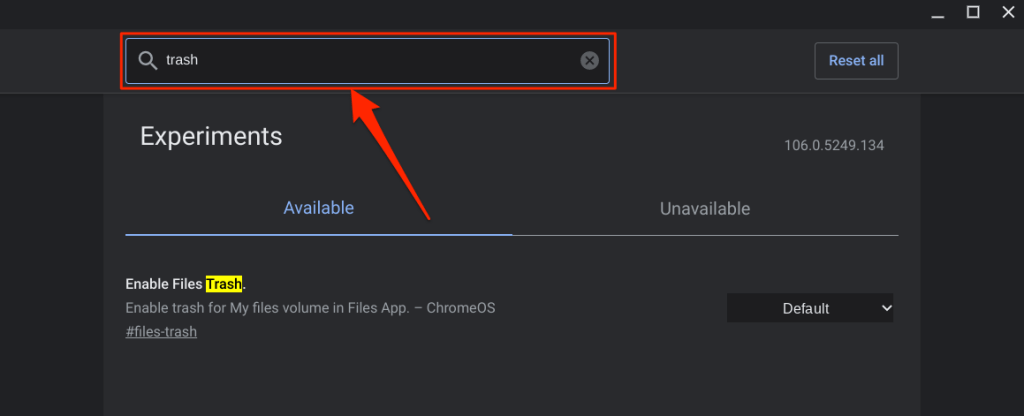
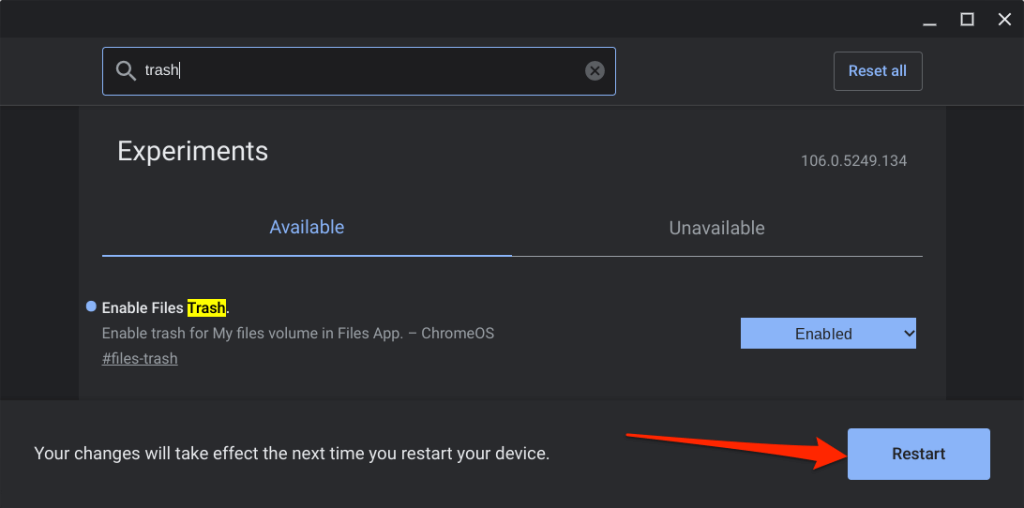
- Expand the Enable Files Trash drop-down menu and select Enabled.

- ChromeOS will add a Trash folder to the Files app when you restart your Chromebook. Select the Restart button to proceed.
- Open the Files app after the reboot and check the bottom of the left sidebar for the Trash folder.

Send Files to Your Chromebook Recycle Bin
To send files to your Chromebook’s recycle bin, right-click the file and select Move to Trash. The Alt + Backspace keyboard shortcut also sends files to the Trash folder.
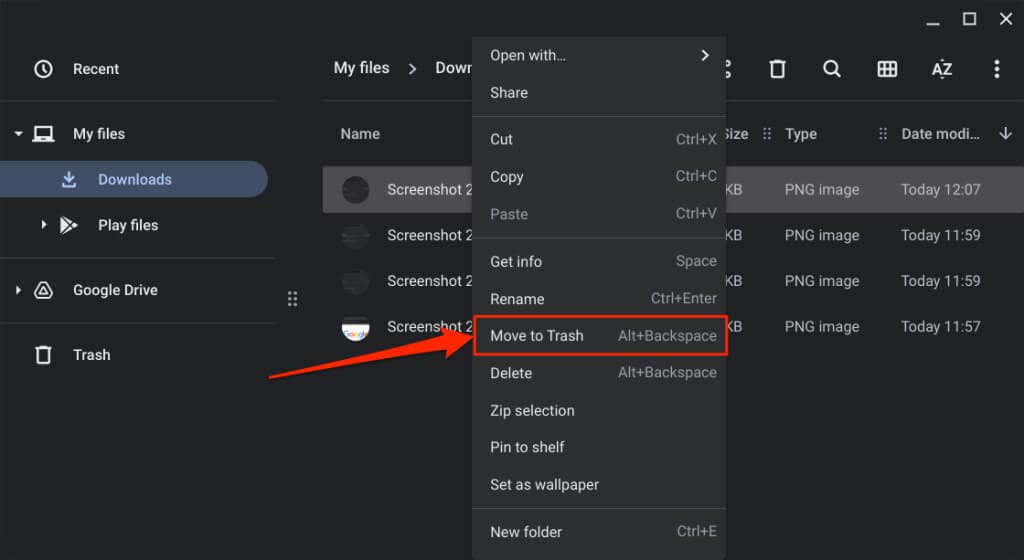
Note: Don’t select “Delete” on the context menu. The “Delete” option doesn’t move files to the Trash folder; it permanently deletes the file instead.
Before You Restore Files from the Recycle Bin
When you restore an item from the Trash folder, ChromeOS returns the file/folder to its original location. Say you restored screenshots deleted in the Downloads folder; ChromeOS will return the screenshots to the Downloads folder.
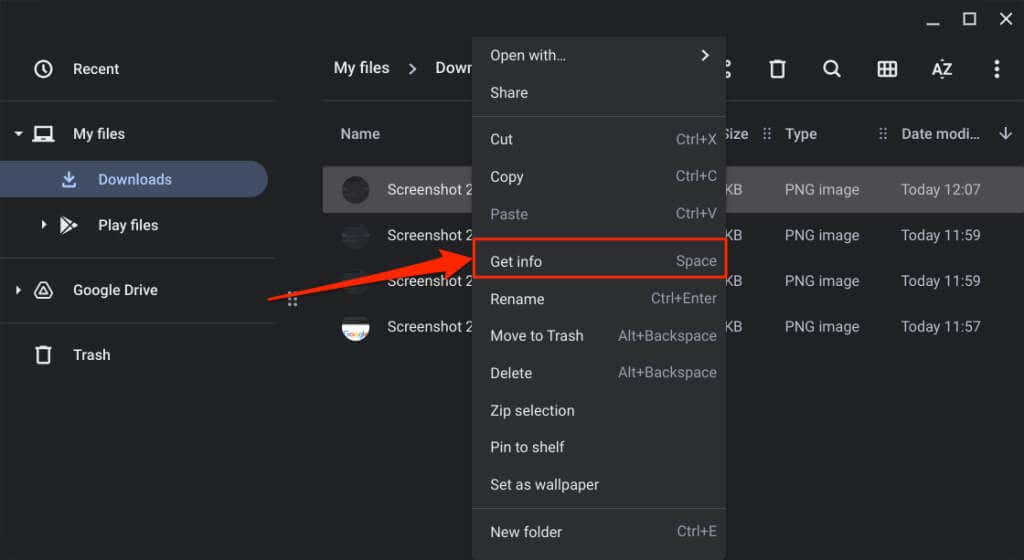
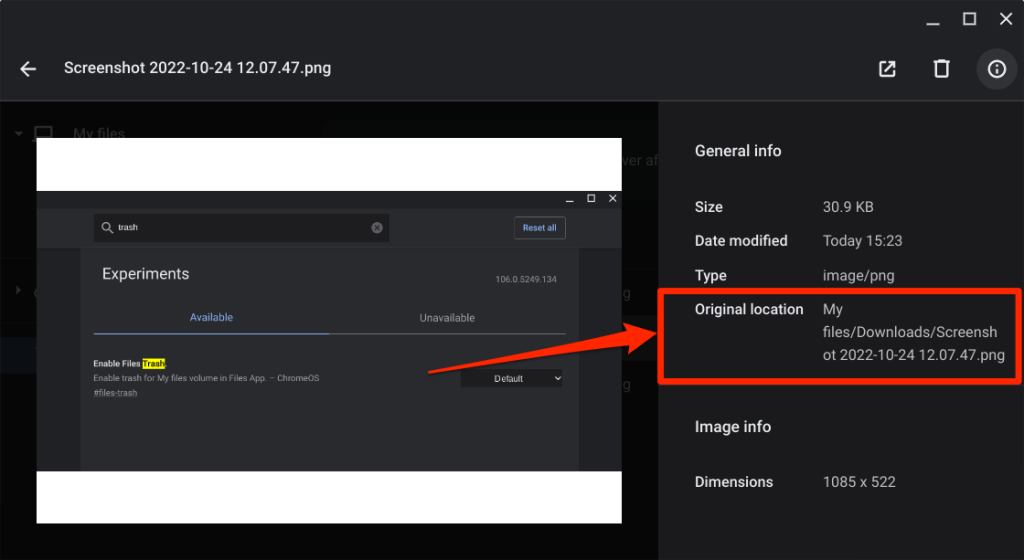
You can check an item’s original location before restoring it from the Trash folder. That way, you know exactly where to find the file/folder after taking it out of the trash.
Open the Trash folder in the Files app, right-click the item you want to recover, and select Get info.
Check the General info section for the item’s “Original location.”
Restore Deleted Files from the Chromebook Recycle Bin
You have 30 days to recover files in the Trash folder before they’re permanently deleted. Open your Chromebook’s Trash, right-click the file/folder you want to restore, and select Restore from trash.
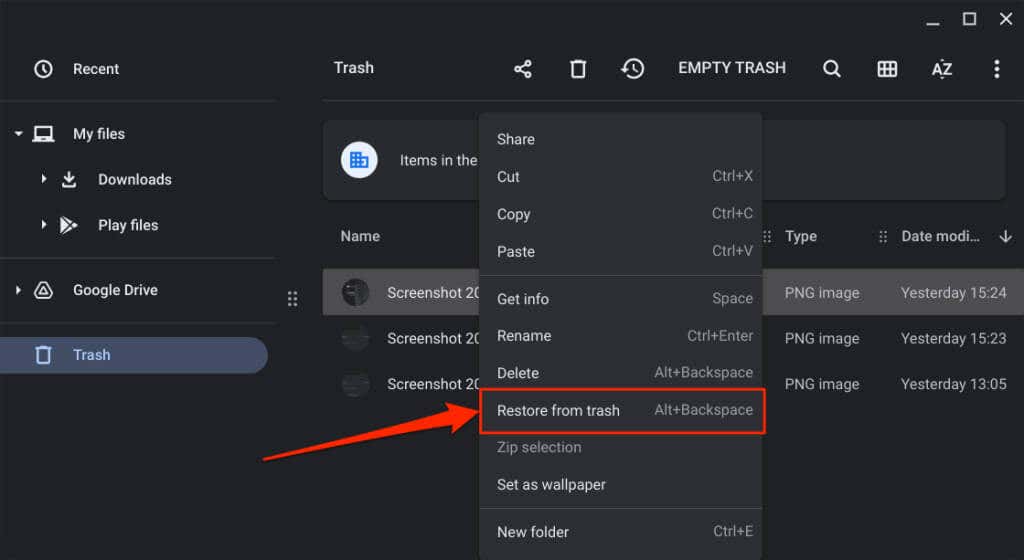
Alternatively, select the file(s) and press Alt + Backspace. ChromeOS will restore the item to its original location in your local storage.
How to Disable Chromebook Recycle Bin
The ChromeOS recycle bin feature is experimental. It can get unstable and may cause your Chromebook to malfunction. Disable the recycle bin if your Chromebook exhibits unusual aftereffects such as excessive battery drain, slow performance, etc.
Turning off the recycle bin is just as straightforward as turning it on. Here’s how to get it done:
- Open the Google Chrome browser, type chrome://flags in the address bar, and press Enter.
- Type trash in the search box, expand the Enable Files Trash drop-down menu and select Disabled or Default.
- Select Restart on the pop-up in the bottom-right corner. When your Chromebook reboots, you won’t find the Trash folder in the Files app.
Disabling or hiding the Trash folder doesn’t delete its content. The files remain in the hidden/disabled Trash folder until the 30-day restoration window expires. Re-enable the Files Trash to restore items to your Chromebook.
An Alternative: Create a Recycle Bin in Google Drive
If you don’t want to enable the hidden Trash folder, create a makeshift recycle bin in the Google Drive folder. The trick is to move the files you want to delete to the makeshift recycle bin in Google Drive.

It’s an effective alternative, but there are limitations to this method. First, you need an internet connection to upload/move files to the makeshift recycle bin. Secondly, backing up large files to the makeshift recycle bin will quickly deplete your limited internet plan and Google Drive storage quota.
On the positive side, files stay in your makeshift recycle bin forever—not 30 days—until you delete them. Additionally, moving unneeded files to Google Drive is a great way to free up storage space on your Chromebook.
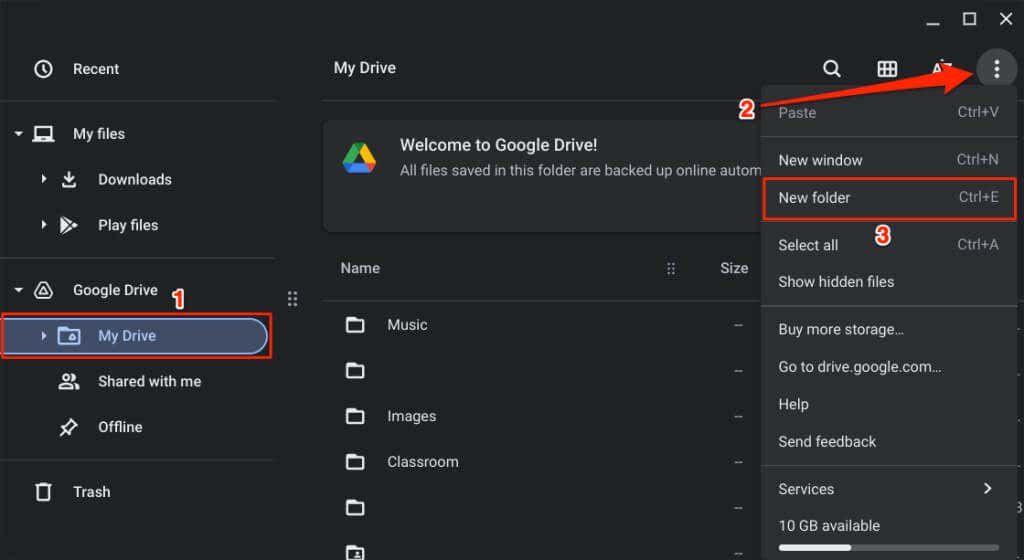
- Open the Files app and select Google Drive on the left sidebar.
- Select the three-dot menu icon in the top-right corner and select New folder.
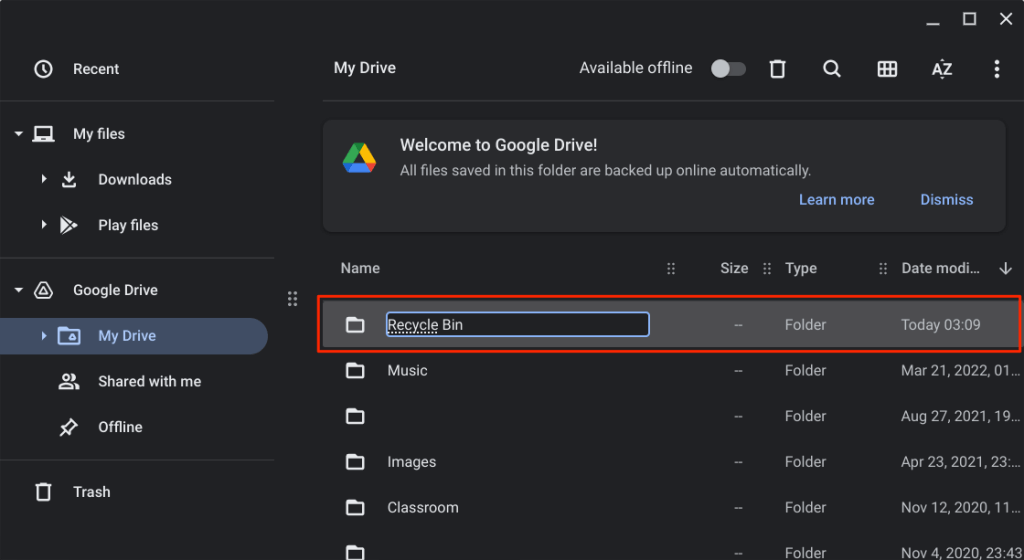
- Name the folder Recycle Bin.
- Select the files you want to move to the new trash folder and select Cut or press Ctrl + X.

- Return to the Google Drive tab, right-click the recycle bin folder and select Paste into folder.
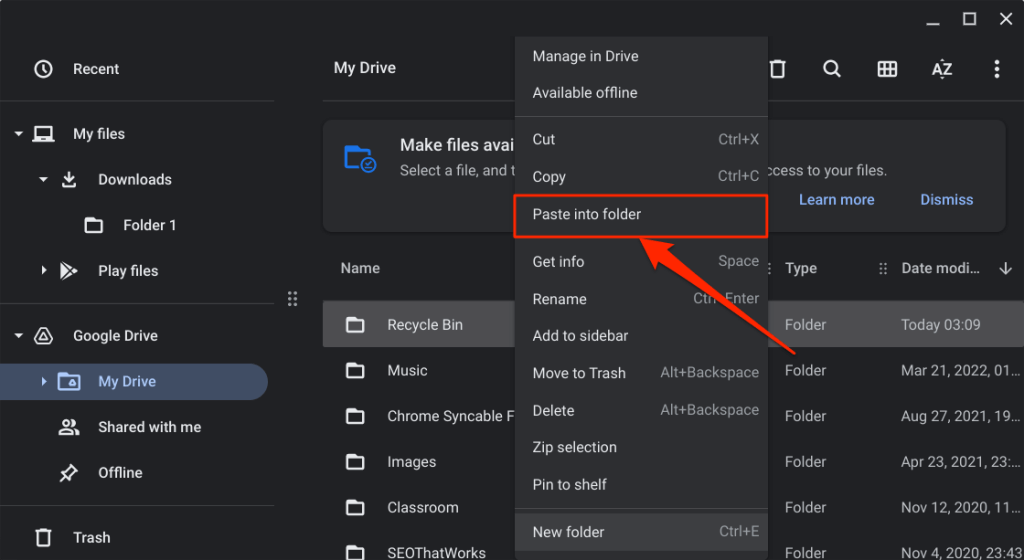
To restore the file, open the makeshift recycle bin and move it back to its original location.
Recycle Bin Unlocked
In the future, we’re sure Google will introduce a recycle bin for the stable channel of ChromeOS. Until then, you have two options: use the hidden Trash folder or create a makeshift recycle bin in Google Drive.
Source by helpdeskgeek.com


