The Amazon Appstore app lets you install Android apps and games onto your Android device. If you don’t have an Android device but still want to use apps available on the Amazon Appstore, you can actually use your Windows 11 system. This is thanks to the Amazon Appstore Preview app available in the Microsoft Store.
Doing this does require a few steps to get it working. Specifically, you’ll need to enable virtualization, and then finally install Amazon Appstore. In this article, we’ll walk you through the entire process.
Note: This process is for Microsoft Windows 11 users. It will not work on Apple macOS systems.

Requirements to Install Amazon Appstore in Windows 11
Before you can install the Amazon Appstore on your Windows 11 PC, there are a few system requirements you need in place.
- Operating System: Windows 11
- RAM: 8 GB (minimum)
- Processor: Intel Core i3 (8th Gen), AMD Ryzen 3000, or Qualcomm Snapdragon 8c
- CPU: x64 or ARM64
- Windows Virtualization: Must be enabled
- Hard Drive: SSD
- Country & Region: United States
In addition to these minimum requirements, you’ll also need to be signed up for the Windows Insider Beta Channel.
How to Install the Amazon Appstore in Windows 11
The following three steps will help you ensure that you have the non-device-specific requirements that you need in order to install and run the Amazon Appstore.
Join Windows Insider Program
Access your Windows Update settings to join the Windows Insider Program, or to change your registration to beta.
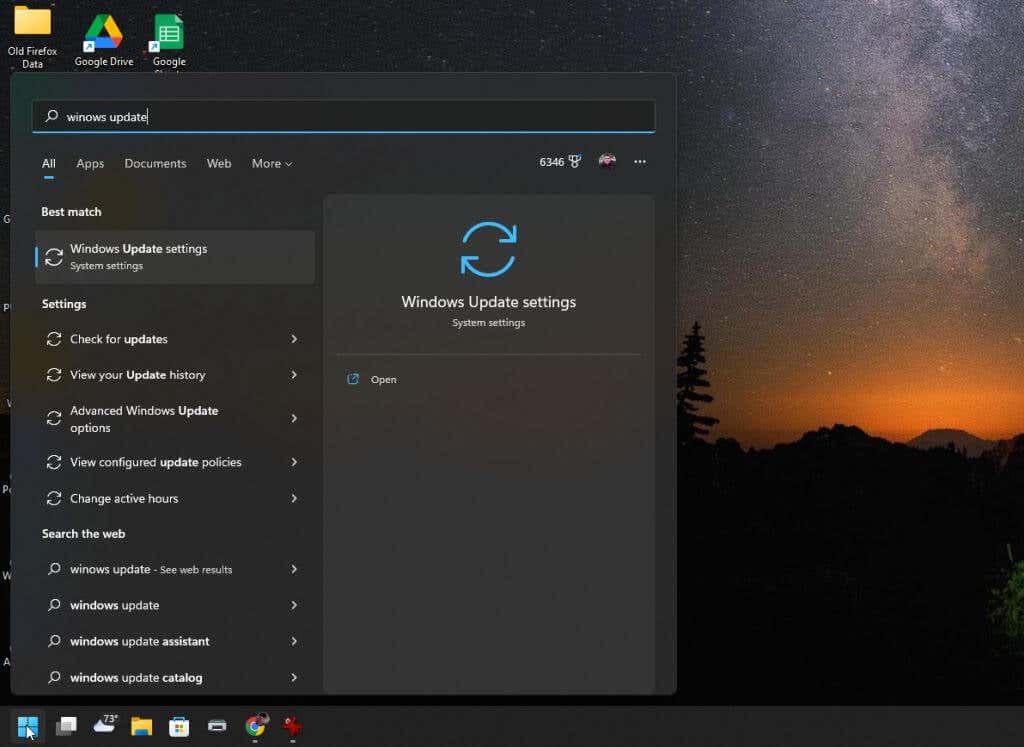
1. Select the Start menu, type “Windows Updates”, and select Windows Update settings.
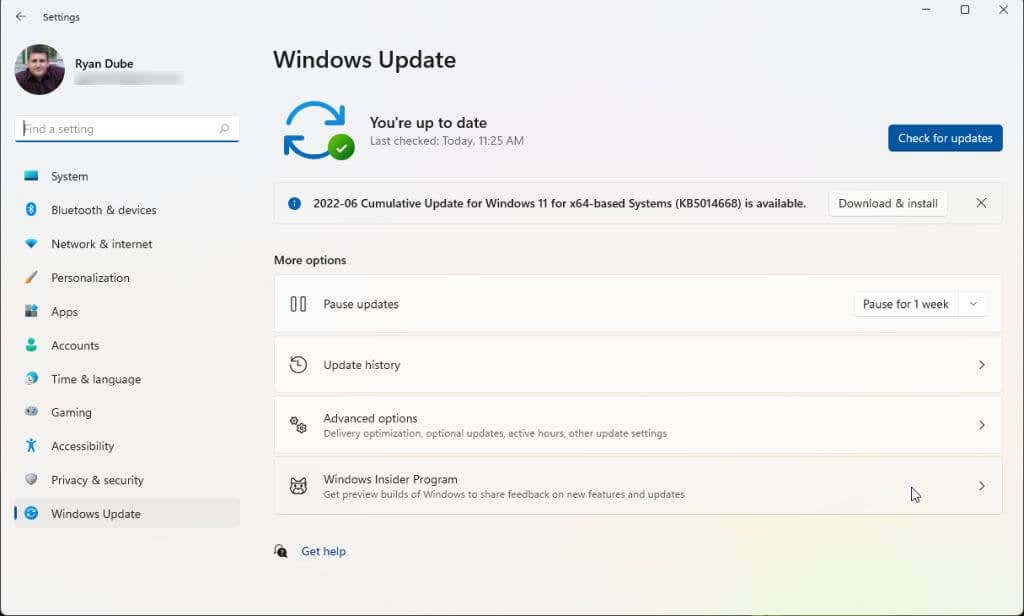
2. In the Windows Updates window, select Windows Insider Program from the right pane.
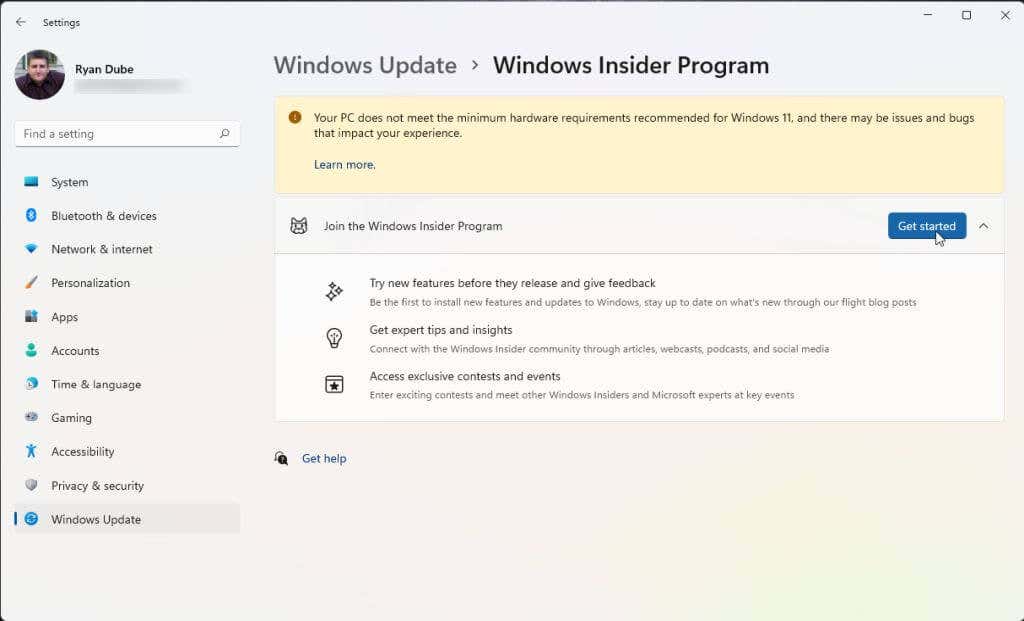
3. In the Windows Insider Program window, select the Get started button to launch the process of signing up for the program.
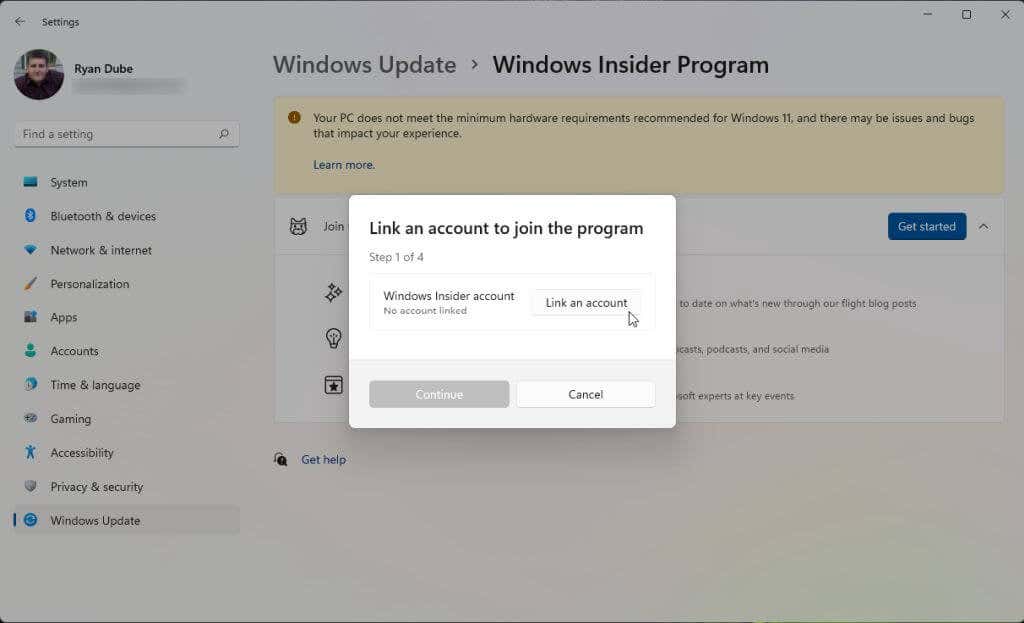
4. In the pop-up window, select Link an account. Choose which Microsoft account you want to use to join the program. If you sign in to Windows 11 with your Microsoft account, then this is the account you should use.
5. After you agree to the program terms, you’ll see three Insider channels to choose from. To install Amazon Appstore, you’ll want to select Beta Channel. Then select Continue.
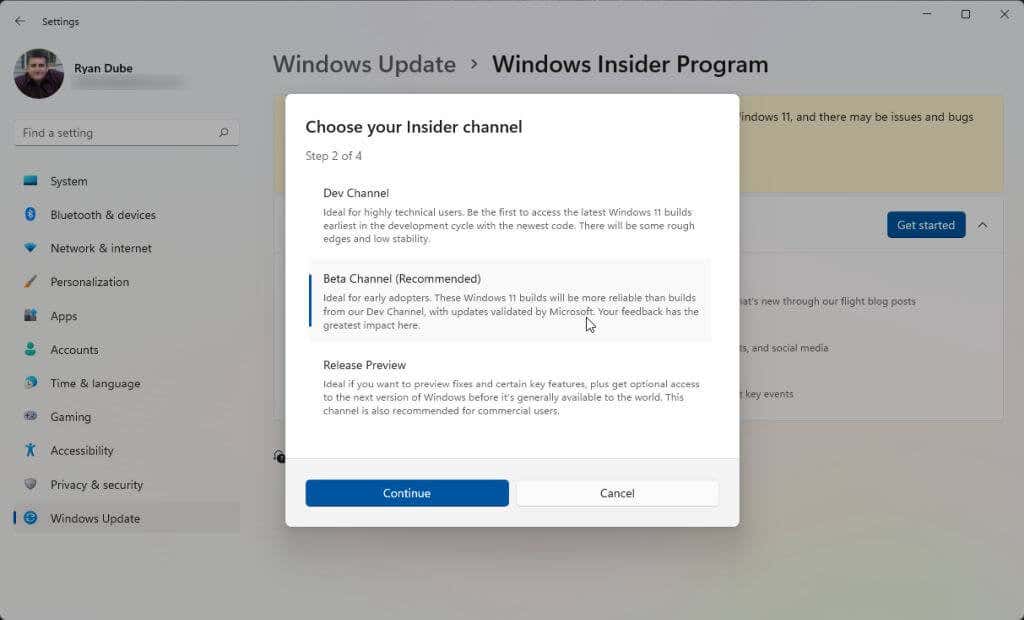
6. Finally, you’ll need to restart your computer for the changes to take effect. Just select Restart now and wait for your computer to restart.
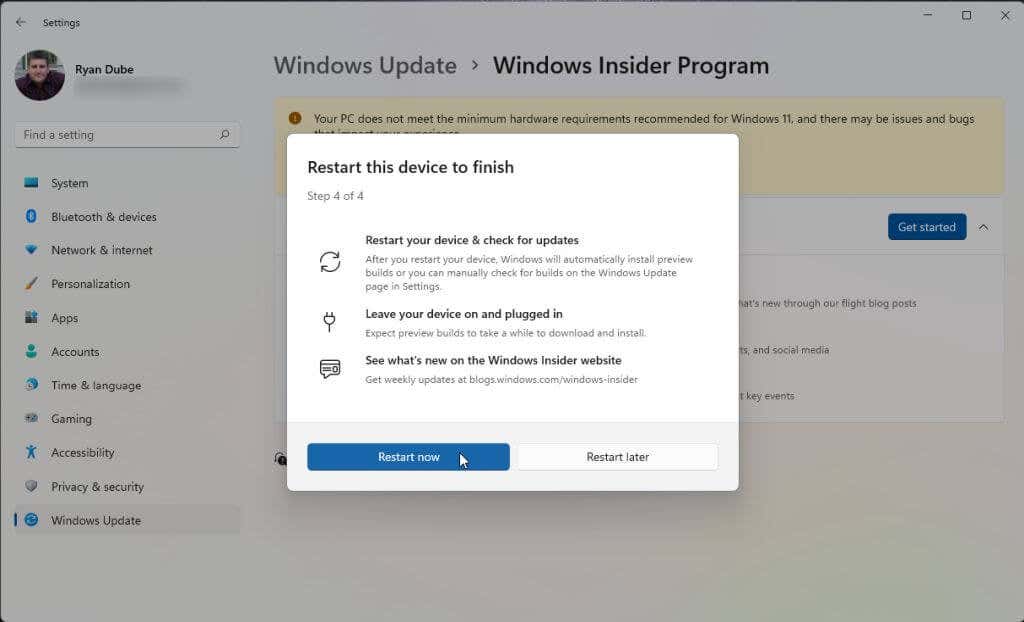
After your system boots back up, you’re ready to move on to the next section. If you already have virtualization enabled and you’re inside the U.S., you can skip to the step of installing Amazon Appstore.
Enable Virtualization (Virtual Machine Platform)
To install the Amazon Appstore, you’ll need Virtual Program Platform enabled. This is a Windows feature that is not enabled by default.
1. Select the Start menu, type “Windows Features” and select Turn Windows features on or off.
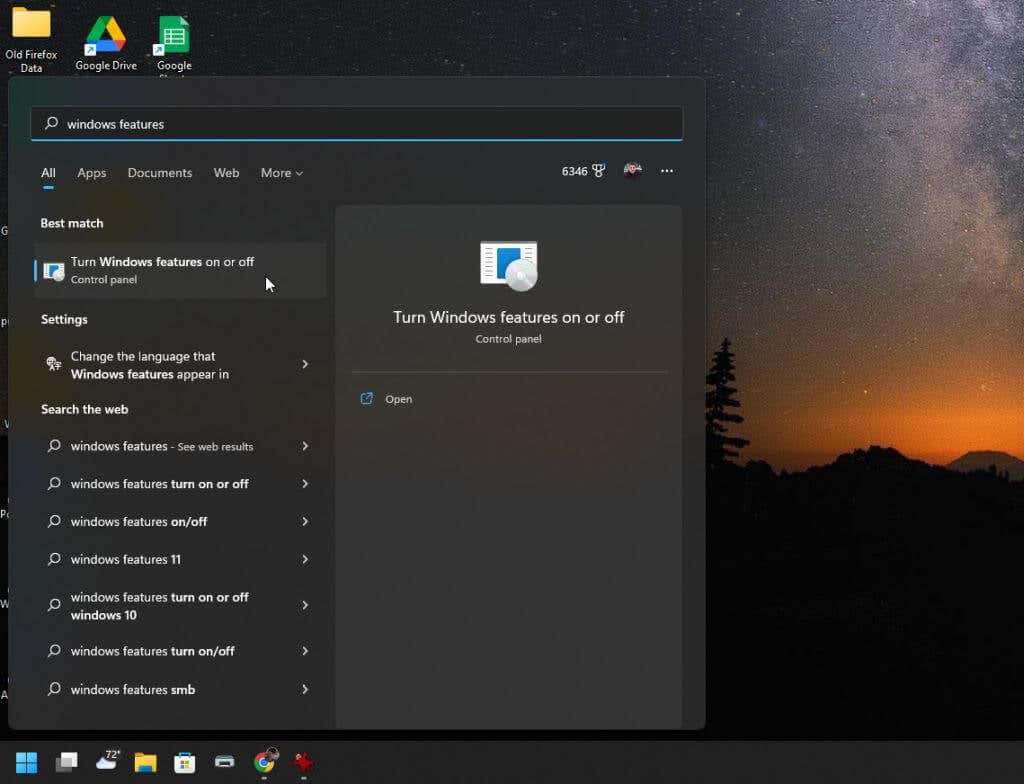
2. Scroll down to and enable Virtual Machine Platform then select OK.
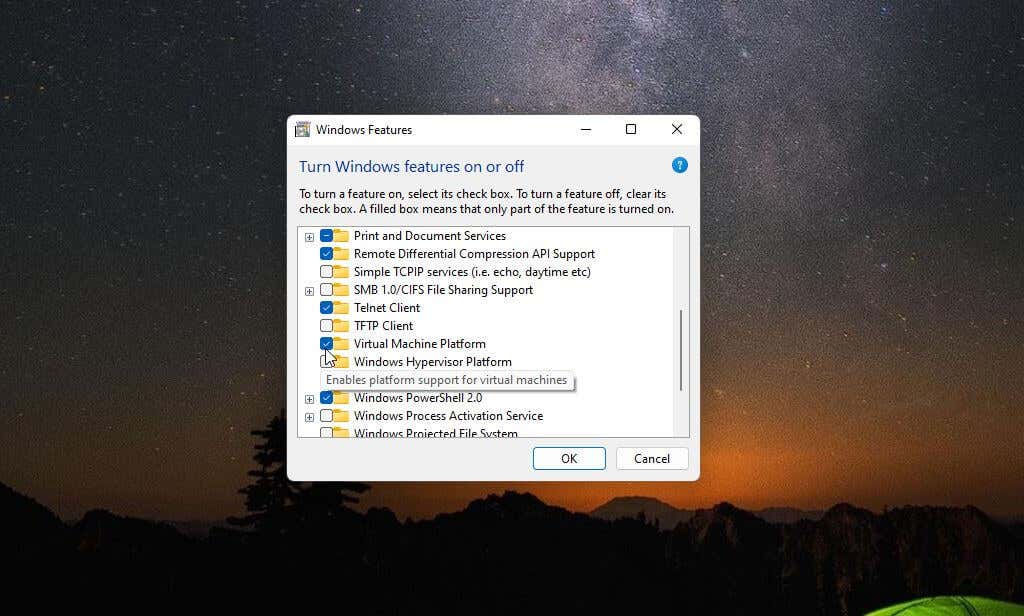
3. Restart your computer to make these changes take effect.
Set Region to the United States (If Outside U.S.)
In order to create a U.S.-based Amazon account so that you can use the Amazon Appstore, you’ll need to do two things. First, you’ll have to set your computer region to the United States. And secondly, you’ll need to use a VPN and set your IP to a U.S.-based location.
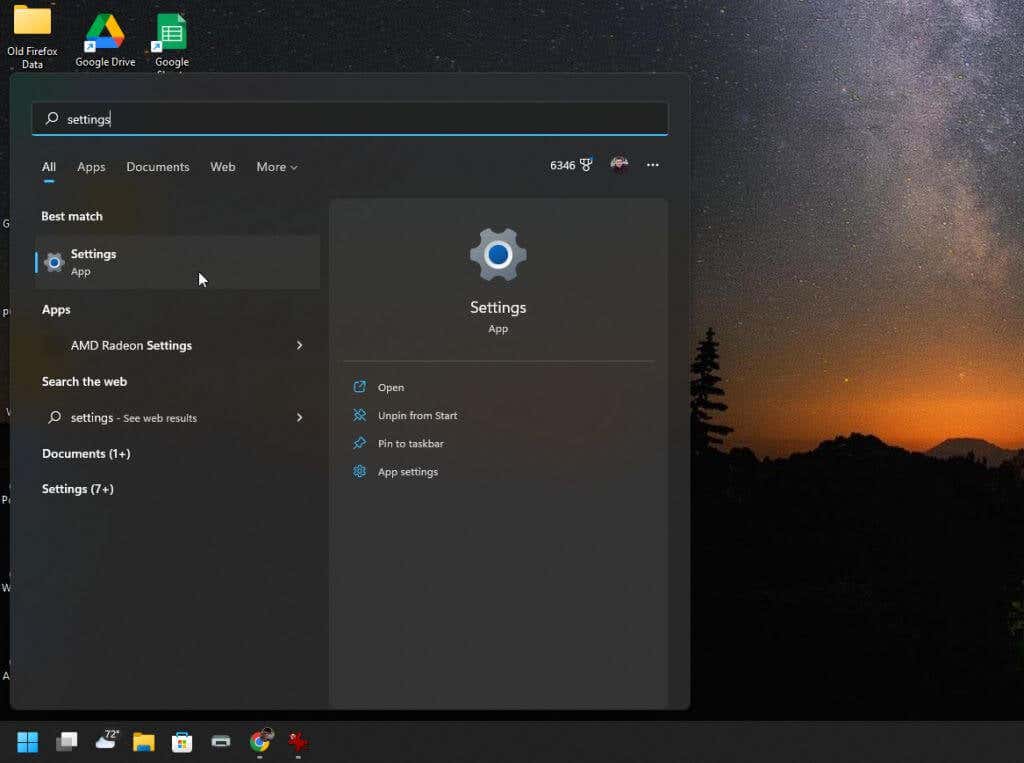
1. Select the Start menu, type “Settings”, and select the Settings app.
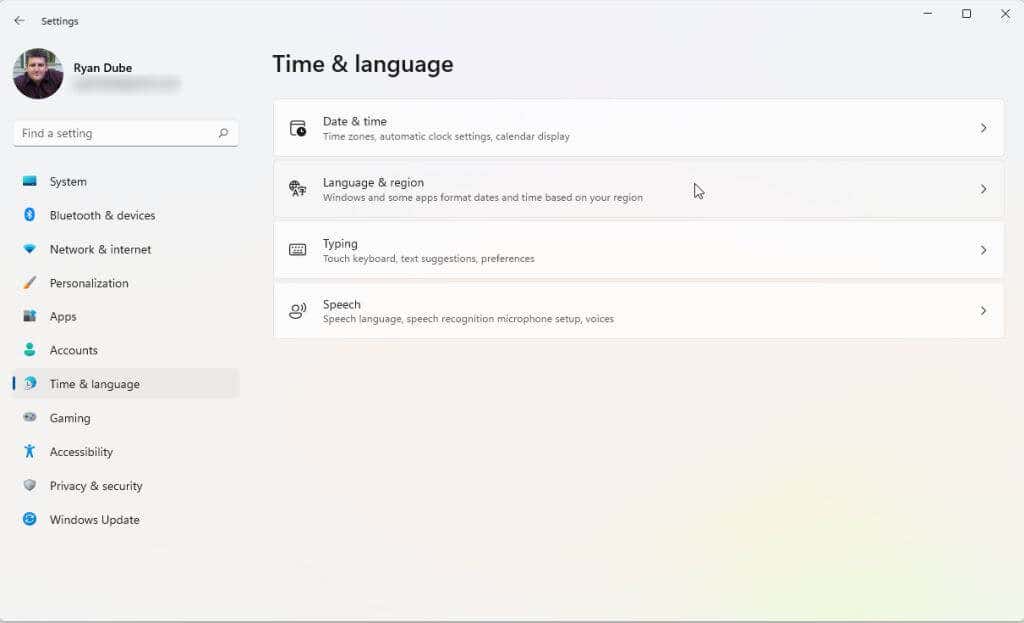
2. Select Time & language from the left menu, and then select Language & region from the right pane.
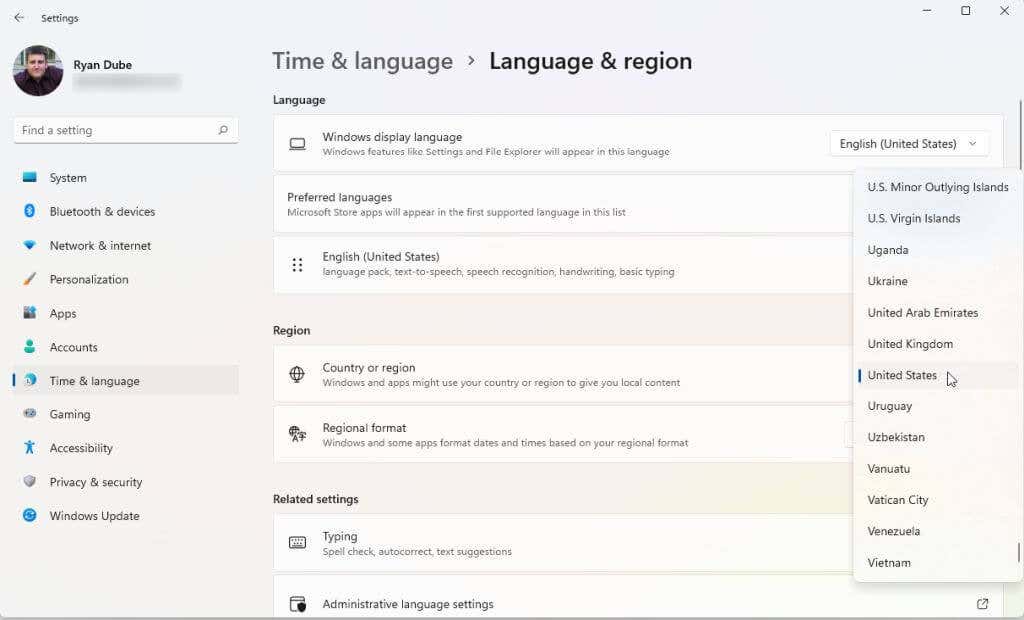
3. On the Language & region window, set the dropdown menu in the Country or region section to United States.
4. Finally, restart your computer to apply these changes.
You’ll also need to select and install a good VPN. Set the VPN so that your IP address is that of a U.S. location. Once you do this, you’re ready to install and run the Amazon Appstore.
Install the Amazon Appstore
Your system should now be ready to install the Amazon Appstore.
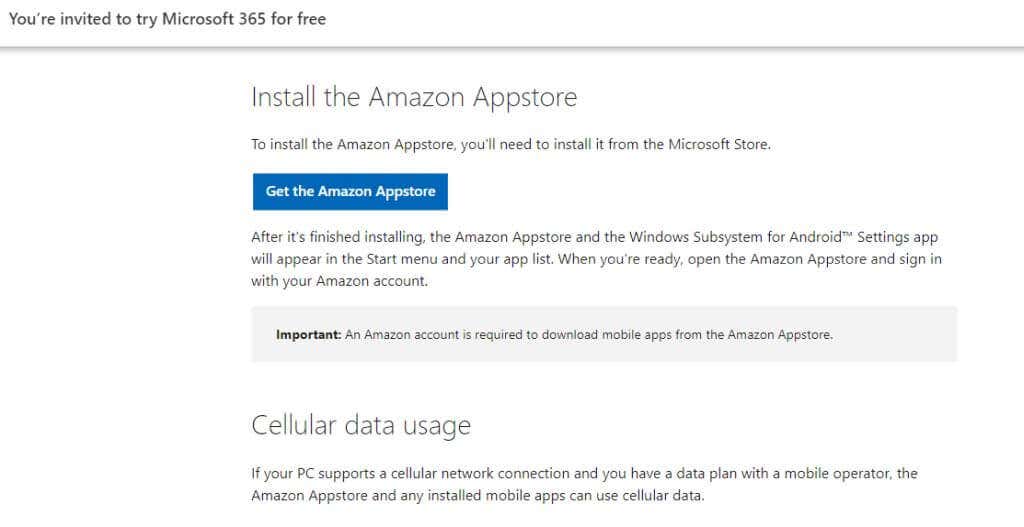
1. Visit the Microsoft Amazon Appstore page and select the Get the Amazon Appstore button.
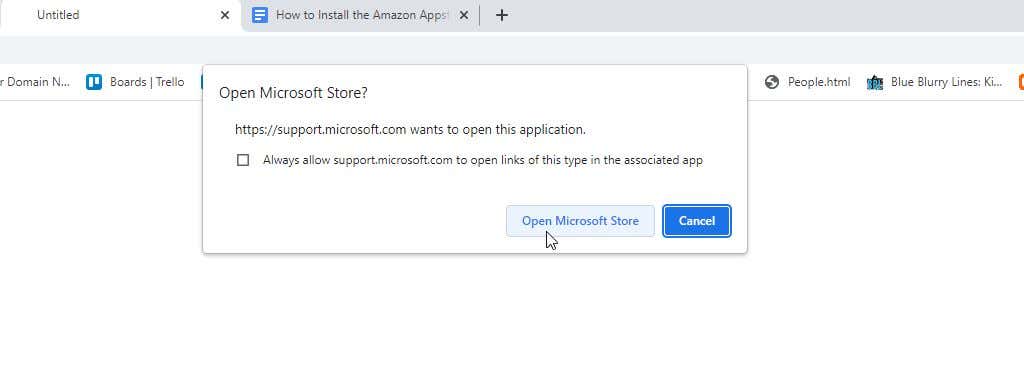
2. You’ll see a pop-up to visit the Microsoft Store. Select the Open Microsoft Store button.
3. On the Amazon Appstore page, select the Install button
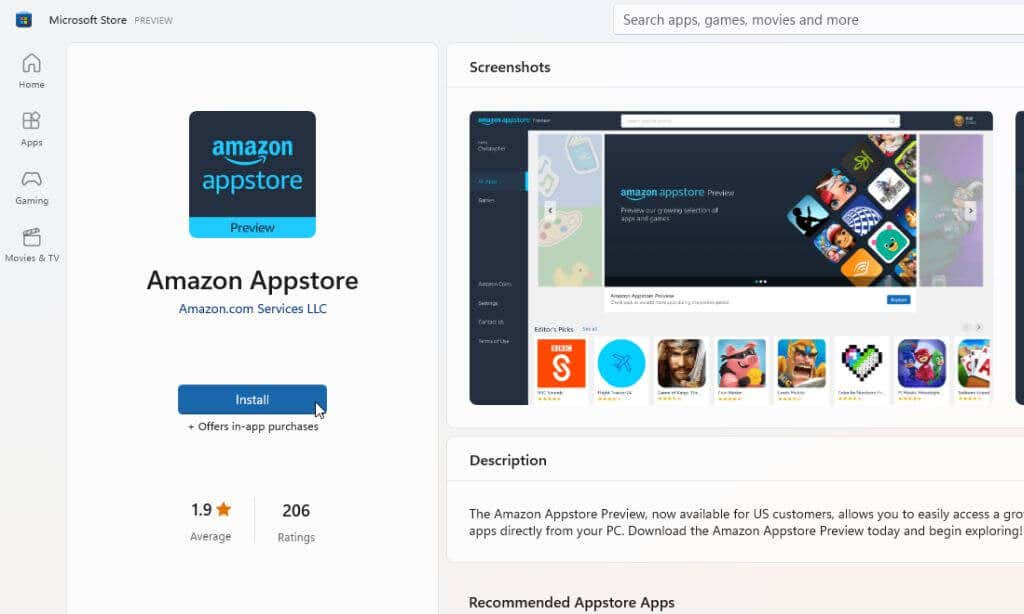
Note: A common error that many people see when they try to install this Microsoft Store app is “This app is not compatible with your device.” This error will display even if your system meets all prerequisites. To fix this, go to the Microsoft Store library and get updates for all installed apps.
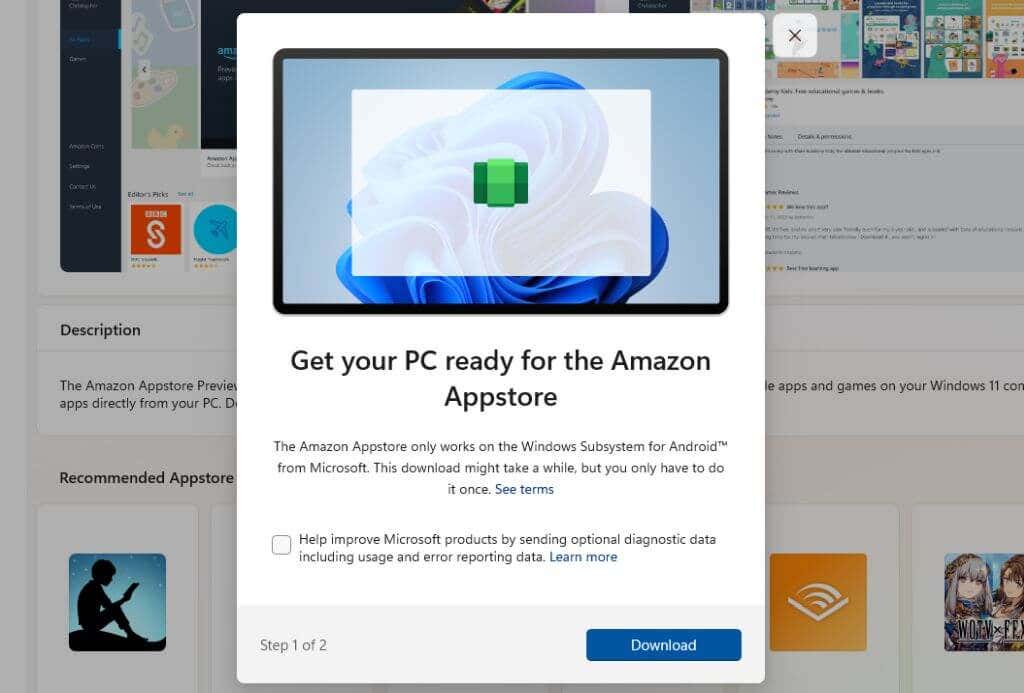
4. In the next pop-up window, select the Download button.
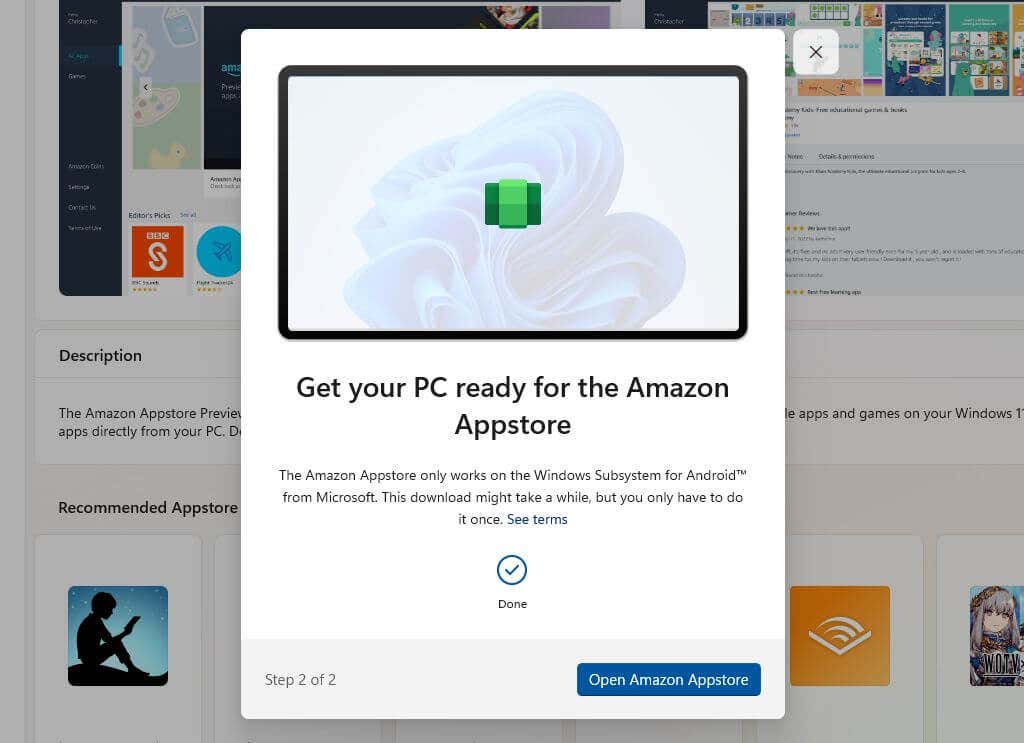
5. The installation process for the latest version of this app will install Windows Subsystem for Android if your computer needs it (if it isn’t already installed). Once this functionality is enabled, the process will then install the Amazon Appstore app. When the installation is done, select the Open Amazon Appstore button.
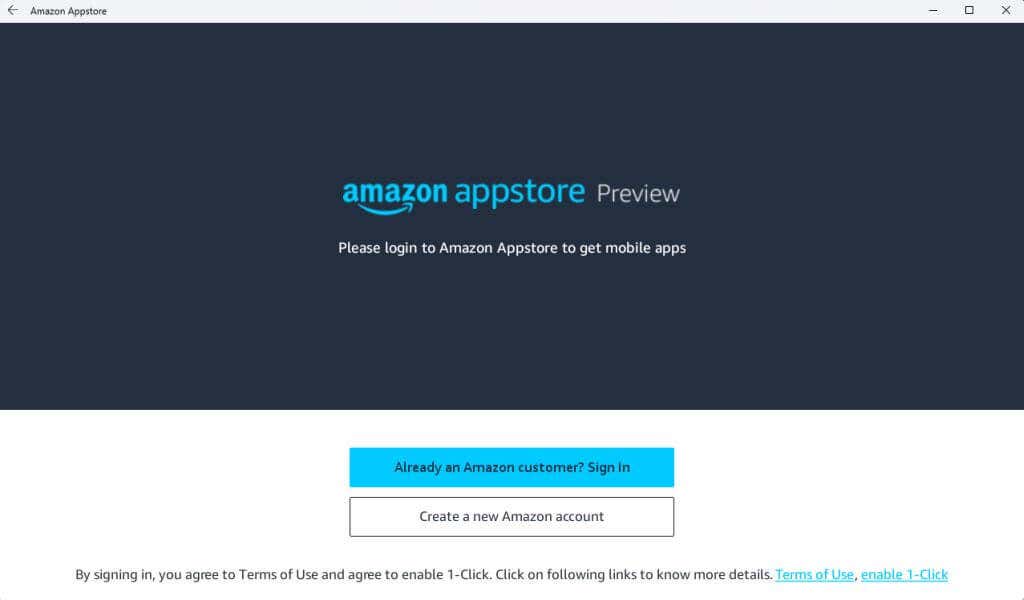
6. A new window will open where the Amazon Appstore will load. You’ll see two options. Either sign in to your existing Amazon account or sign up for a new one. Make sure that the account you use is U.S.-based.
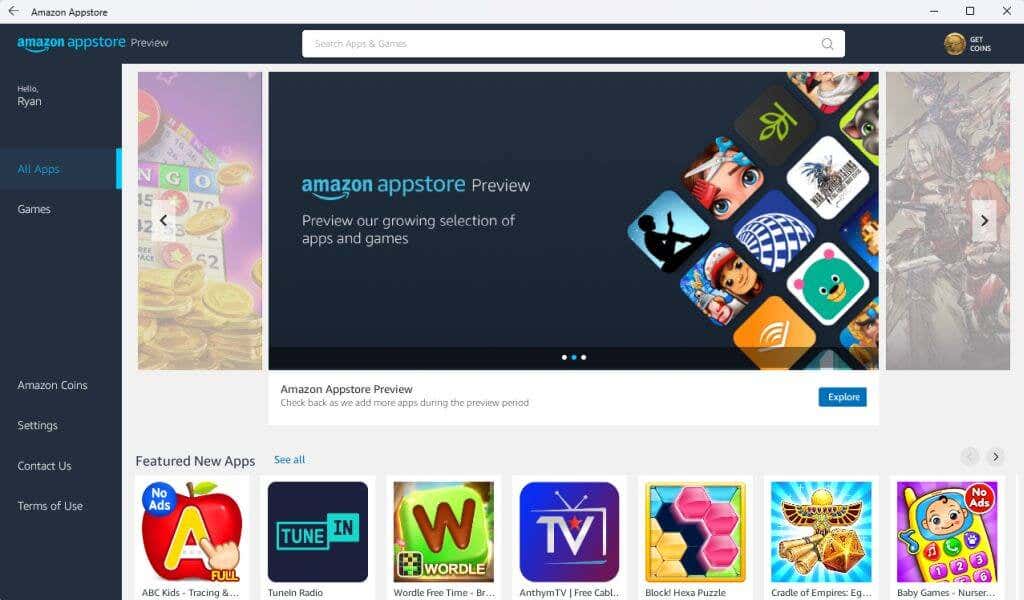
7. Once you’re logged into your Amazon account, you can use the search bar at the top of the window to search the entire Amazon Appstore for your favorite apps or games that you’d like to use on your Windows 11 PC. You also have access to your Amazon coins in this app.
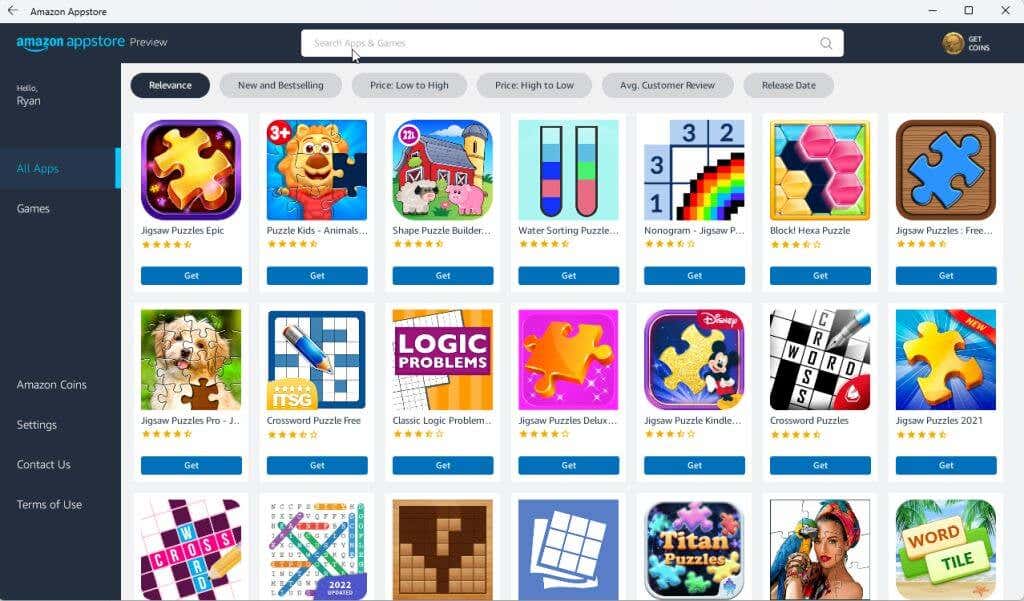
8. Select the Get button under any app to install it.
9. Finally, the app will launch on your PC just like it would if you were playing it on an Android device.
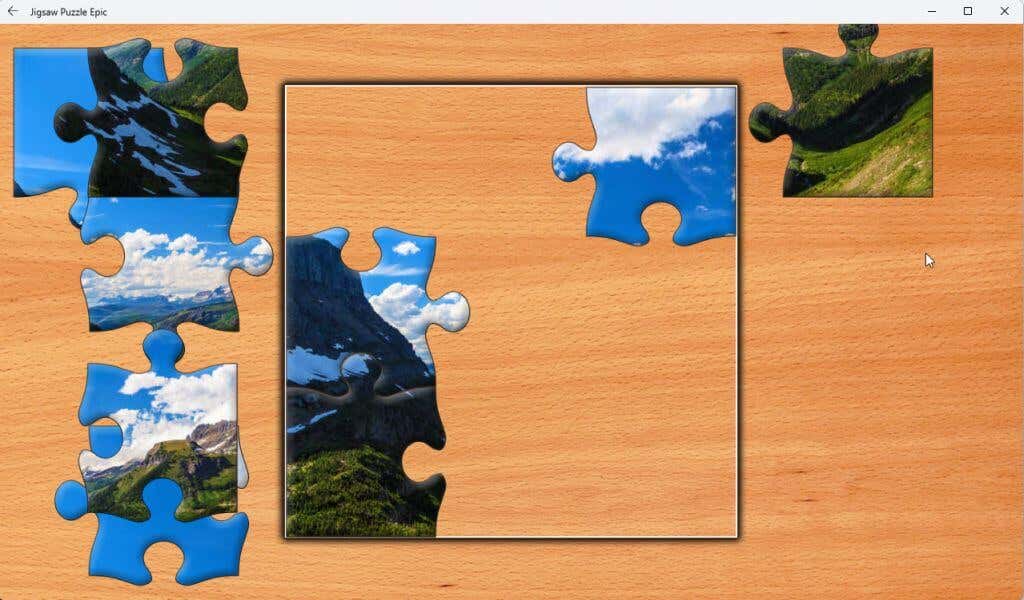
Note: These apps work best on a Windows 11 computer that has a touch screen display, which most modern Windows 11 laptops have.
You can even install the Kindle app for android and turn your Windows 11 computer into a virtual Kindle device. How cool is that?
Now that you’re able to run Amazon Appstore apps on your Windows 11 computer, what apps are you installing? Share what cool things you’re doing with the Amazon Appstore on Windows 11 in the comments section below.
Source by helpdeskgeek.com


