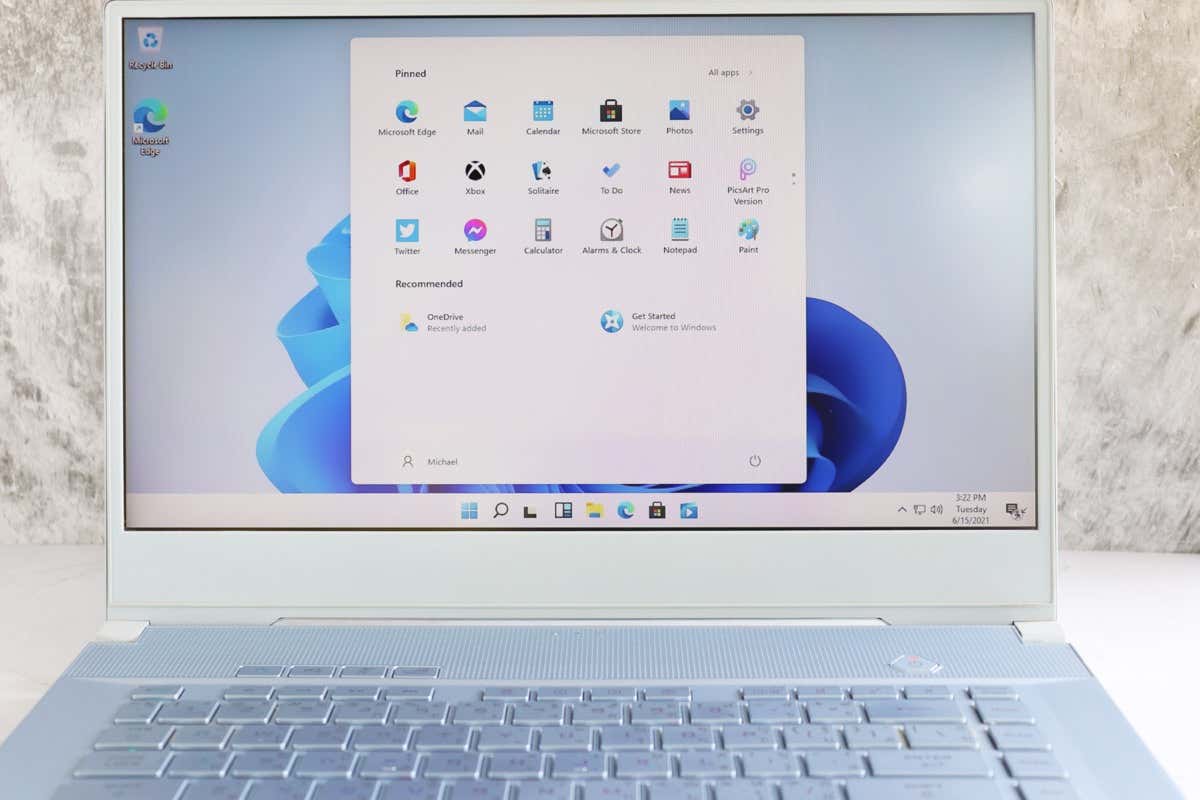
Windows 11‘s new Start menu is drastically different from its predecessors. It’s less flashy and more compact, but it’s also less useful. Whether you love the new Start menu or hate it, you don’t have to stick with it.
Windows 11 does not provide as many customization options for the Start menu compared to older Windows operating systems. Nevertheless, they should be enough to give it your own twist. Or, you can cut to the chase and rely on a third-party app to change how the Start menu works.
Change the Start Menu Alignment
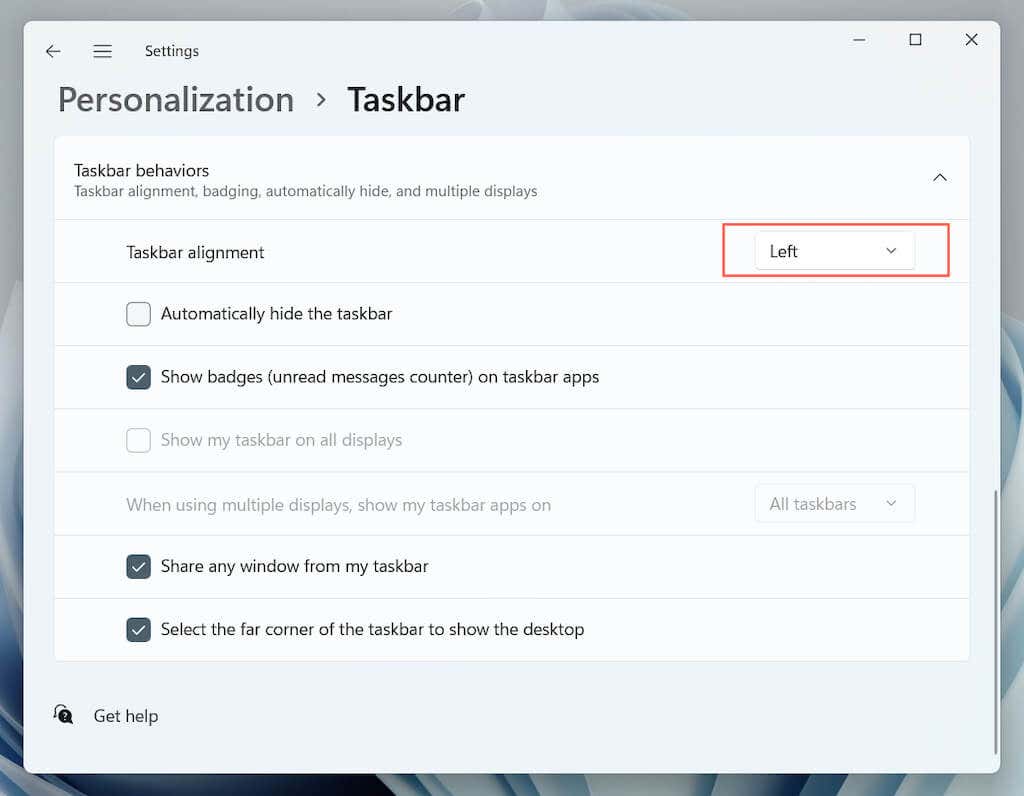
Doing away with tradition, the Start menu in Windows 11 opens from the center of the taskbar. If that feels jarring, you can change the taskbar alignment to make it appear from the left side. To do that:
1. Open the Start menu and select Settings. Or, press Windows Key + I.
2. Select Personalization on the left pane.
3. Scroll down and select Taskbar.
4. Expand Taskbar behaviors.
5. Open the drop-down menu next to Taskbar alignment and switch from Center to Left.
Remove Recommended Apps and Files
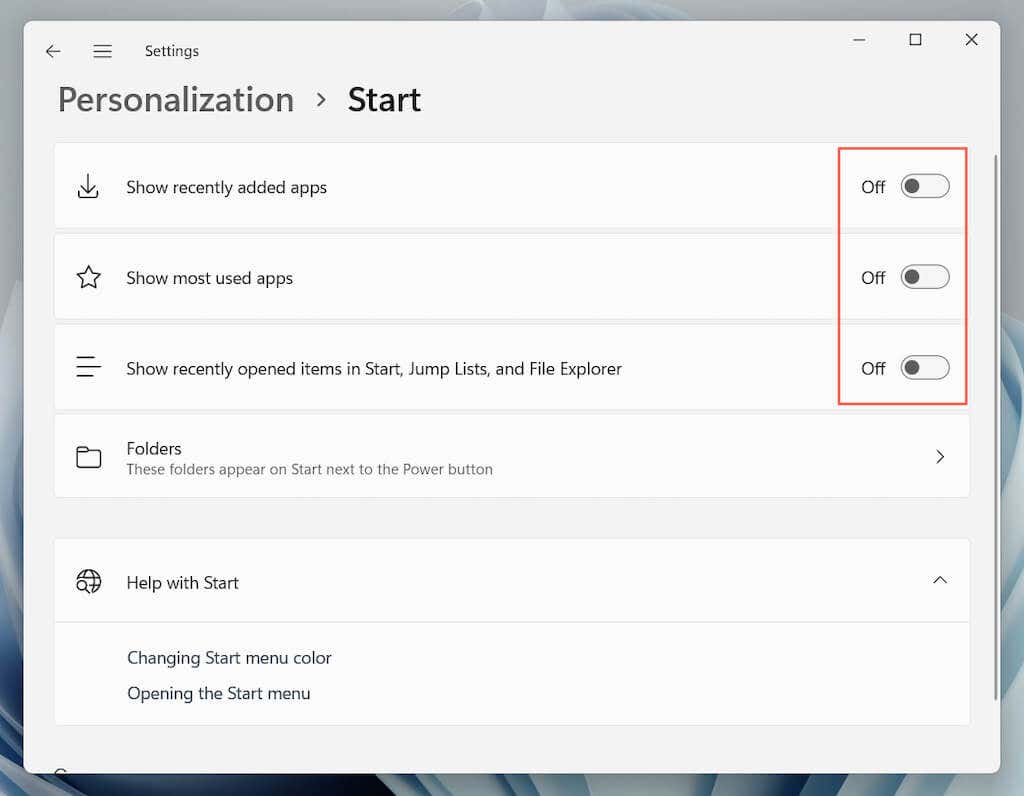
By default, Windows 11’s Start menu displays a list of recommendations at the bottom. These can consist of programs you install or files and folders you frequently open. However, these items can clutter the Start menu or create privacy concerns. To remove them from the Recommended section:
1. Open the Start menu and select Settings > Personalization.
2. Select Start.
3. Turn off the switches next to Show recently added apps, Show most used apps, and Show recently opened items in Start, Jump Lists, and File Explorer as needed.
Add Apps and Folders
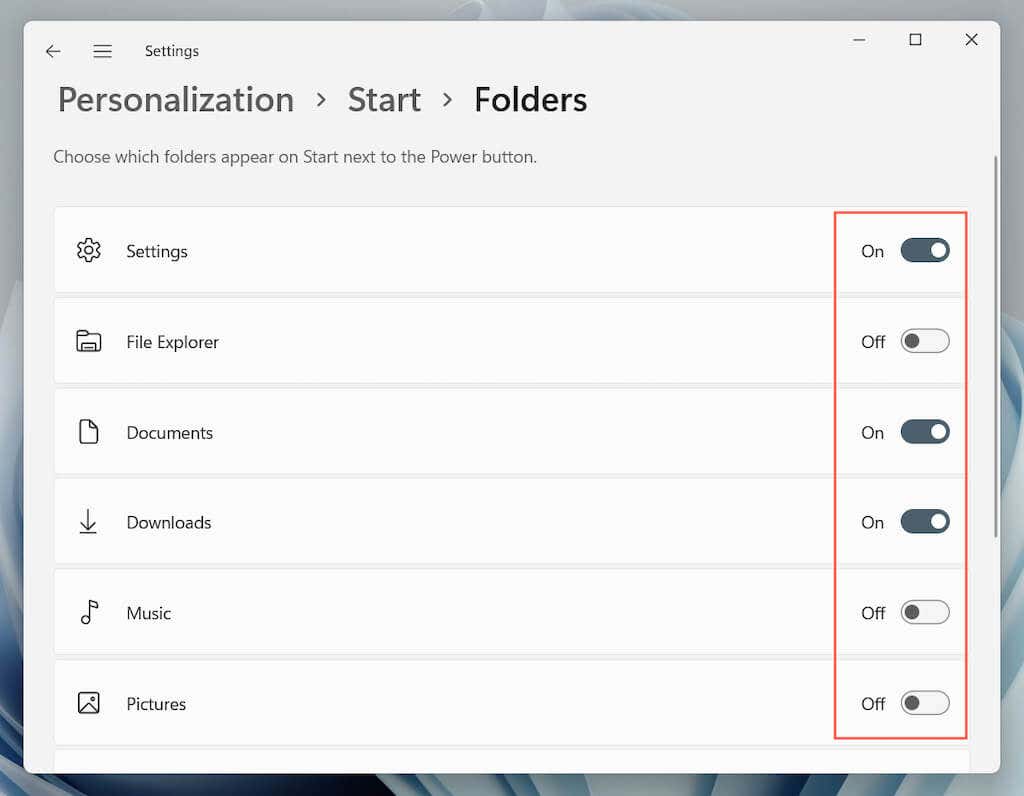
You can make various system-related apps and folders appear next to the Power button for faster access. To do that:
1. Open the Start menu and select Settings.
2. Select Personalization.
3. Select Start.
4. Select Folders.
5. Turn on the switches next to the items you want to add—Downloads, Music, Pictures, etc.
Note: If you turn everything off within the Recommended section, the lower portion of the Start menu will appear completely vacant. You can use that area for anything else.
Add, Remove, and Rearrange Pinned Apps
By default, the Start menu in Windows 11 pins various app icons at the top of the screen. You can add, remove, and re-order items from the Pinned section as follows:
Pin Apps to Start Menu
1. Open the Start menu.
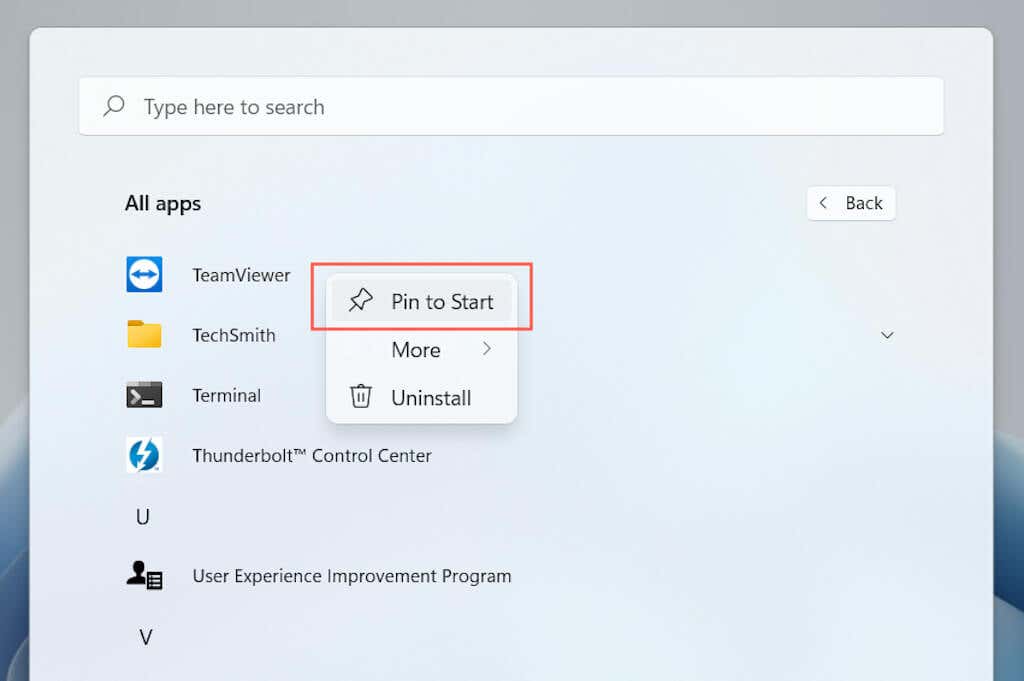
2. Select the All apps button to view a list of installed apps.
3. Right-click an app and select Pin to Start.
Note: The Start menu only displays three rows of pinned apps simultaneously. If you add more, you must scroll down to view them.
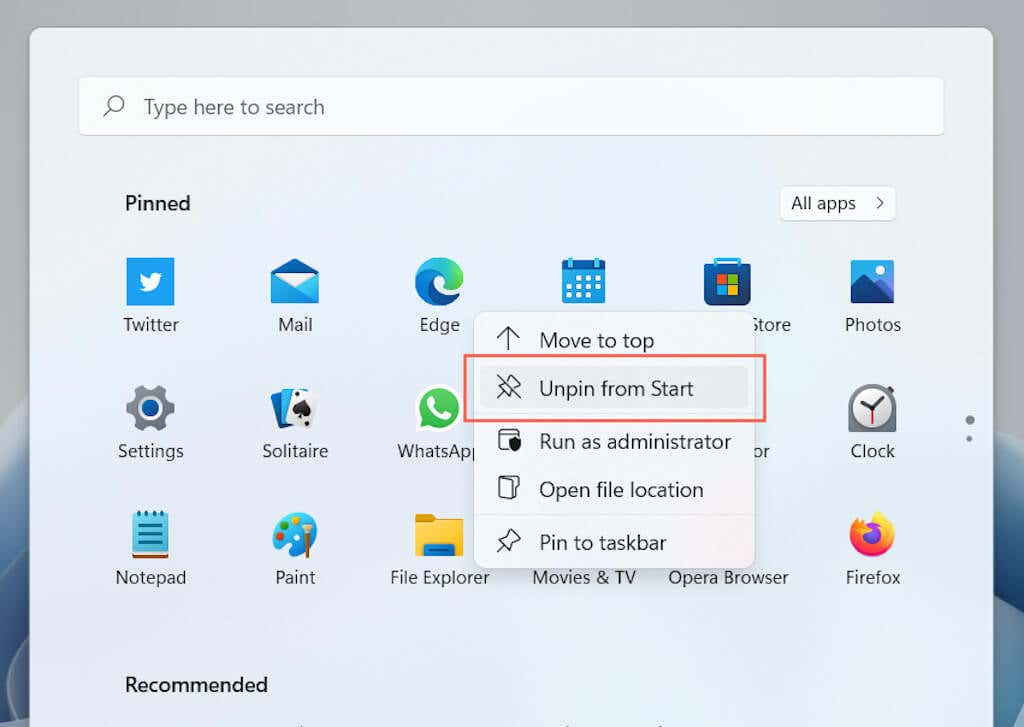
Unpin Apps From Start Menu
1. Open the Start menu.
2. Right-click the app you want to remove.
3. Select Unpin from Start.
Rearrange Apps on Start Menu
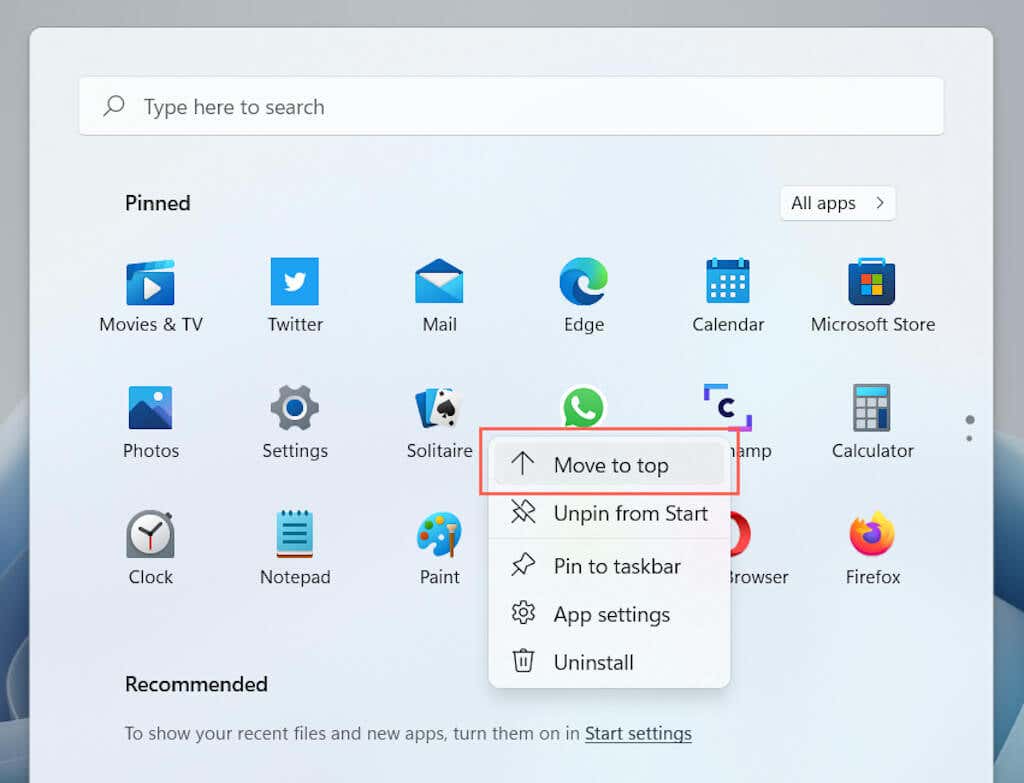
1. Open the Start menu.
2. Right-click an app.
3. Select Move to top to push the app to the top of the Start menu. Or, drag and release the icon where you want it to appear.
Change the Start Menu Color
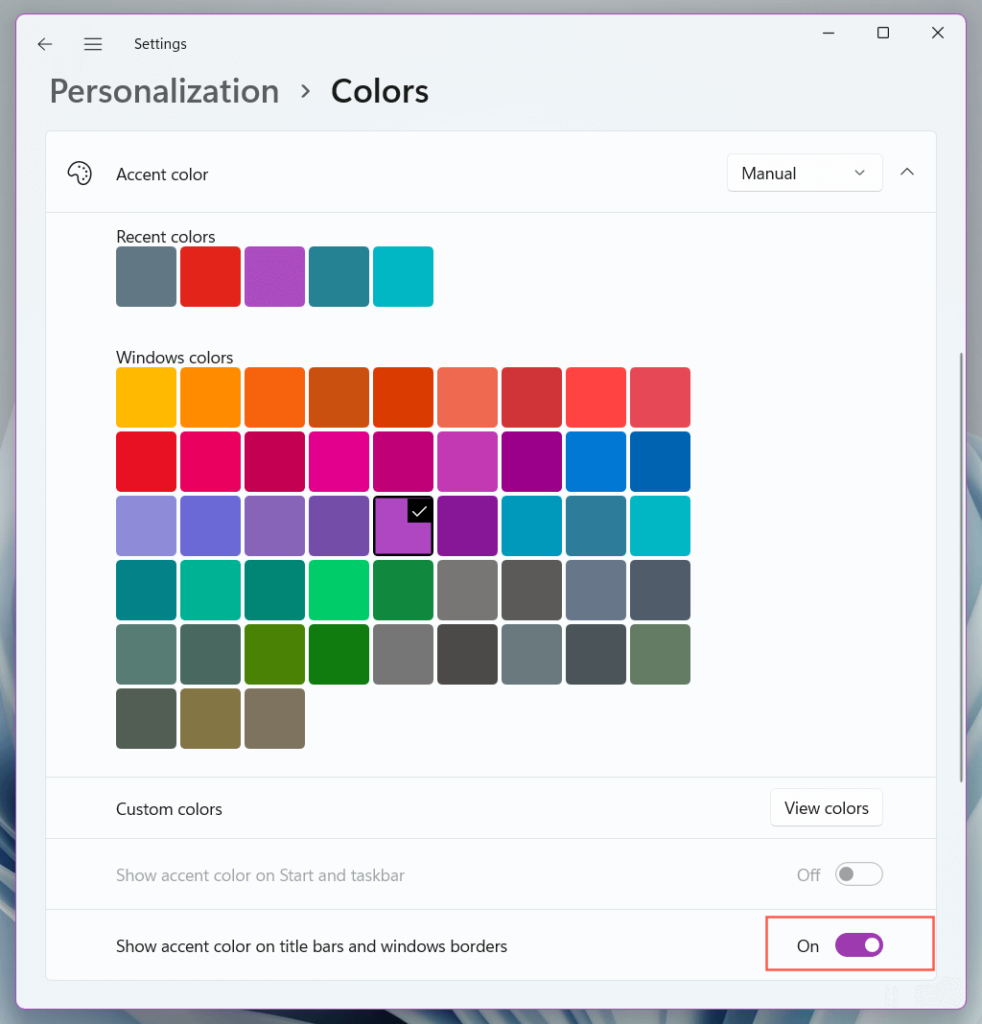
Switching between Windows 11’s Light and Dark modes changes the color of the Start menu. However, those aren’t the only choices you have. To apply different colors to the Start menu:
1. Open Settings.
2. Select Personalization on the sidebar.
3. Select Colors.
4. Scroll down to the Accent color section and pick a color.
5. Turn on the switch next to Show accent color on Start and taskbar.
Customize Start Menu With Start11
To continue customizing Windows 11’s Start menu, you must rely on third-party Start menu customization apps such as Start11, StartAllBack, and Start Menu X.
Start11 is arguably the most polished and user-friendly out of the lot. It costs $5.99 per device, but you can use it for 30 days for free and then decide if you want to purchase it. Here are a few things you can do with it.
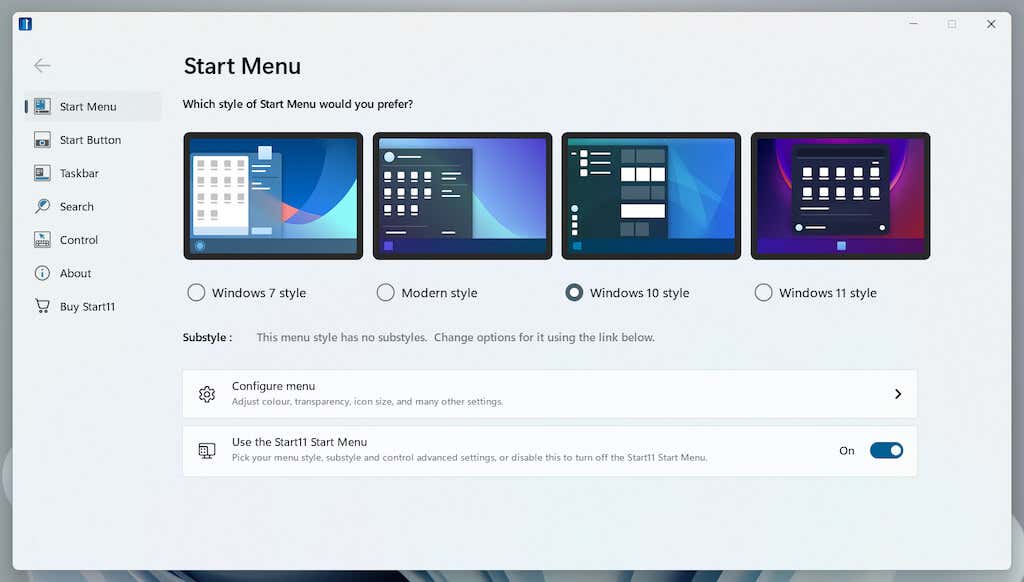
Change the Start Menu Style
Start 11 comes with multiple pre-configured Start menu layouts. After installing Start 11, you can pick between available styles via the Start menu tab.
These include the Windows 10 Start menu (minus the live tiles), Windows 7’s classic Start menu, Start11’s Modern style menu, or an improved version of the default Windows 11 Start menu. Each style also features multiple sub-styles (compact, grid, or a combination of the two) that you can switch to.
Customize the Start Menu
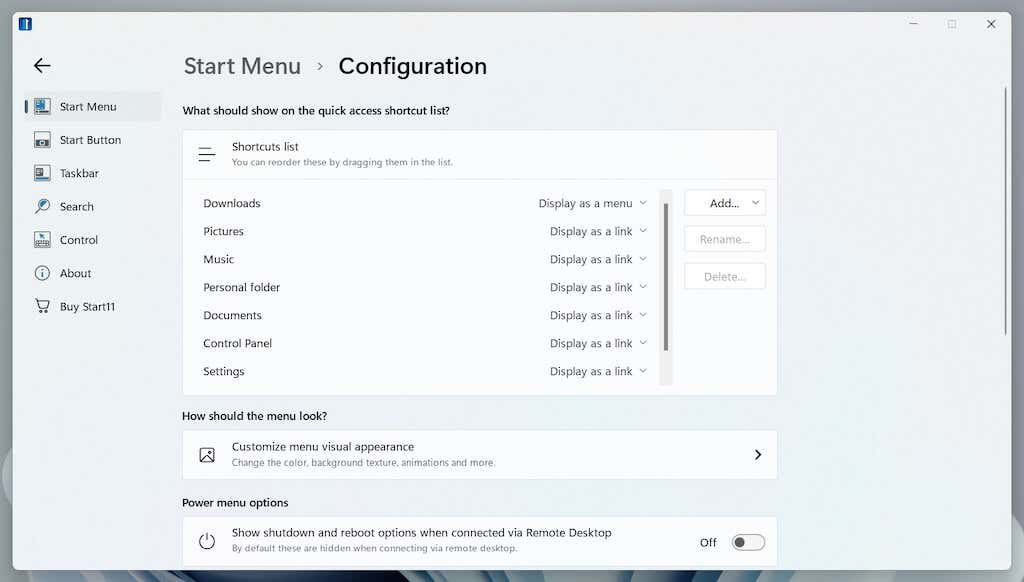
Start11 provides loads of customization options that you use to change the appearance and functionality of your preferred menu style. Select the Configure menu option, and you can adjust the color and transparency, re-order your quick access list, expand the menu to cover the entire screen, etc. Be sure to experiment.
Add a New Start Button
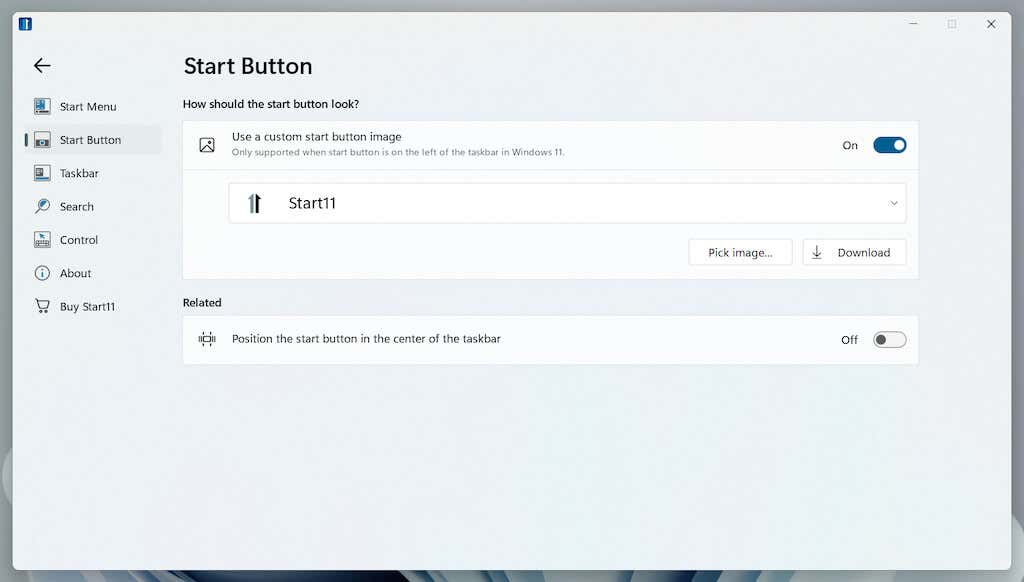
If the Microsoft Windows 11 logo on the Start button bores you, you can quickly change that with Start11. Switch to the Start Button tab, and you can switch between multiple built-in icons or use your icons.
Change How the Taskbar Works
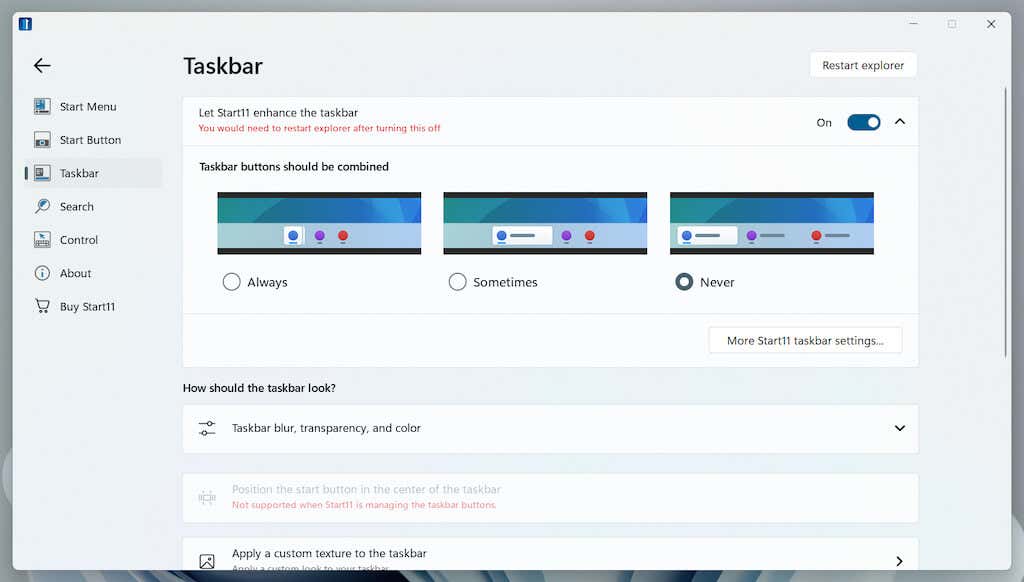
Start11 also extends customization support to the Windows 11 taskbar. Switch to the Taskbar tab to tweak its appearance with custom textures, change the position (e.g., make it appear at the top of the screen), add the contextual menu from Windows 10, etc. You must restart Windows Explorer to apply your changes.
Improve Start Menu Search
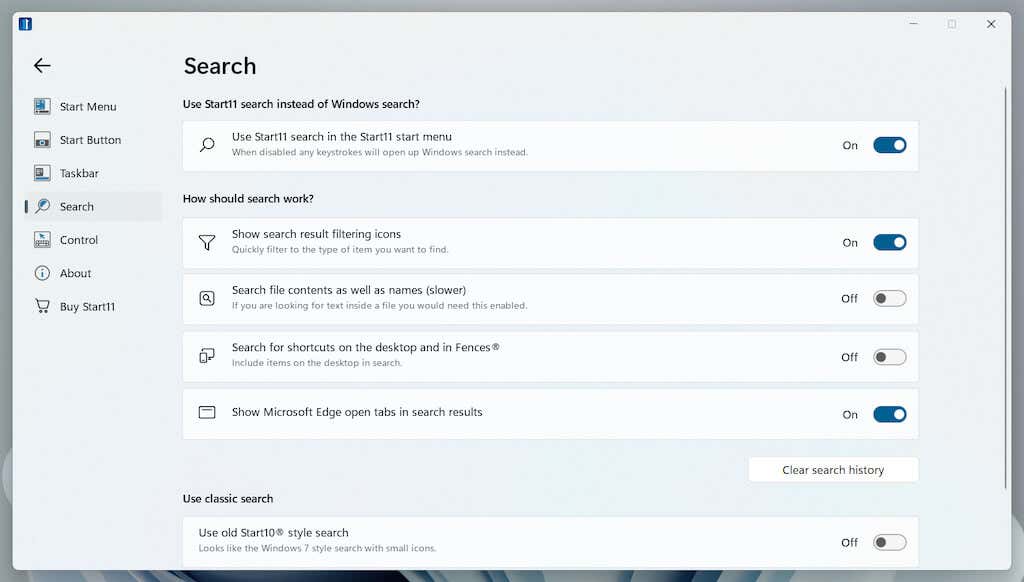
If you use Windows Search a lot, you can replace it with Start11’s custom search engine. It can find stuff faster, locate contents inside files, search for shortcuts on the desktop, etc. Visit the Search tab and turn on the switch next to Use Start11 search in the Start11 start menu to get started.
Make It Personal
The Start menu is your focal point in Windows 11, so customizing it is the best way to enhance your experience while interacting with the operating system. If the native options aren’t enough, using Start 11 or an alternative Start menu customization app can be a worthy investment. Next up, check what you can do to uninstall annoying pre-installed apps from Windows 11.
Source by helpdeskgeek.com


