Microsoft Outlook’s disconnected error appears when the app can’t connect to the internet or your email server. This usually happens when you’re using offline mode or your internet connection isn’t working. We’ll show you a few ways to resolve the error.
Some fixes include disabling offline mode, ensuring your internet connection is working, and turning off Outlook’s problematic add-ins.
Fix Outlook by Disabling Offline Mode
The Outlook client’s offline mode allows you to work on your emails while being disconnected from the internet. If you’ve enabled this mode, that may be why Outlook can’t establish a connection.
You can resolve the issue by disabling the offline mode.
- Select the Send/Receive tab at the top of the Outlook window.
- Select the Work Offline option.

- Outlook will connect to your email server.
Make Sure Your Internet Is Working
If Outlook doesn’t connect to your email server after disabling offline mode, your internet connection may be facing issues. This can cause the app to display a disconnected message.
To fix that, check if your internet is working by launching a web browser on your computer and opening a site like Google. If the site loads, your internet is working. In this case, read on to learn more fixes.
If your browser fails to load the site, you have network connectivity issues. In this case, try to fix the issue yourself or reach out to your internet service provider for help.
Access Your Emails on the Web
It’s possible your email server has a problem, causing Outlook not to establish a connection. In this case, try to access your mailbox using an alternate method and see if that works.
For example, head over to Outlook for the web and try to access your Outlook account there. Similarly, head to the Gmail site and check if you can access your Gmail emails there.
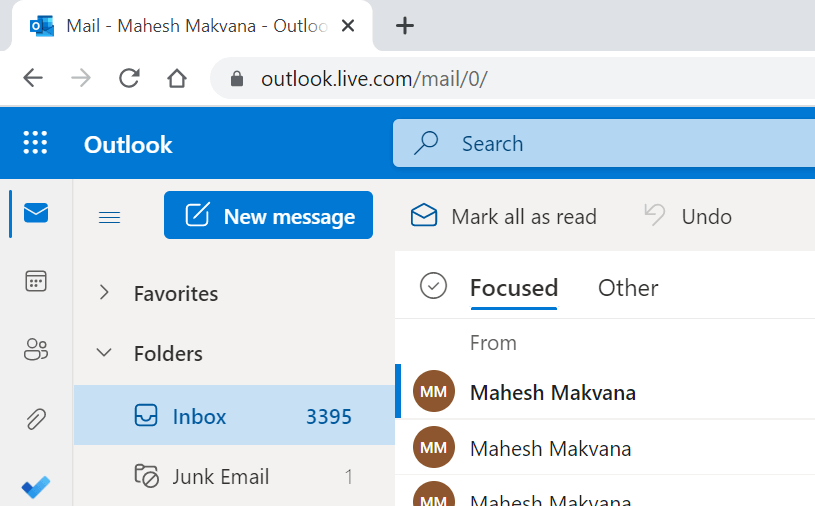
If you can’t access your emails on the web, your email provider is experiencing problems. You can reach out to them and seek help.
Restart Your Windows PC to Fix the Outlook Disconnected Error
Your PC’s minor glitches can cause Outlook not to make a connection with your email server. You can resolve most temporary issues by giving your PC a reboot.
Before you do that, save your unsaved work, so you don’t lose anything.
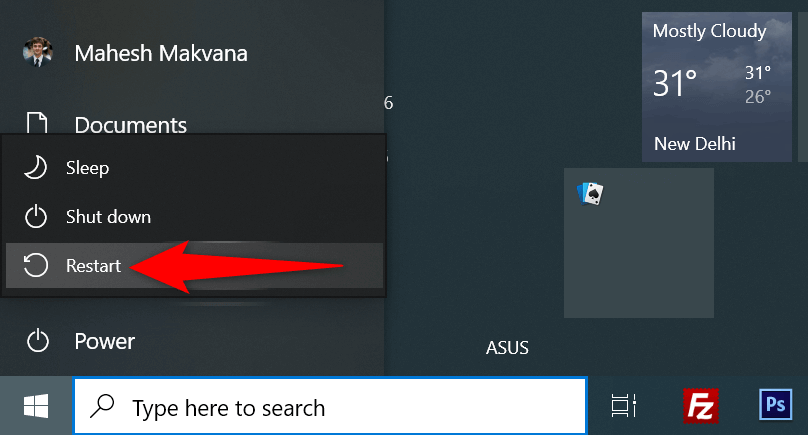
- Open the Start menu and select the Power icon.
- Choose Restart from the Power menu.
Update Microsoft Outlook
Outlook’s app bugs can be the cause of the disconnected error. You can resolve most of these bugs by updating your app to the latest version.
Microsoft offers free updates for all your Office apps, including Outlook.
- Open Outlook and select File at the top-left corner.
- Choose Office Account from the sidebar on the left.
- Select Update Options > Update Now in the pane on the right.
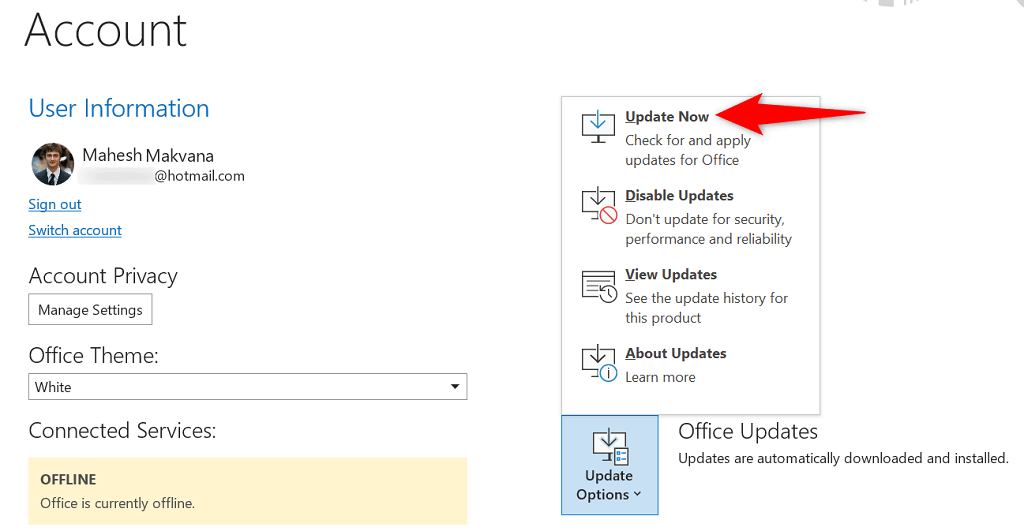
- Wait for Outlook to find and install the updates.
- Close and relaunch Outlook.
Turn Off the Windows Firewall
Windows’ built-in firewall ensures your computer is safe from network-based threats by blocking various suspicious activities. The tool may have mistakenly recognized Outlook as a potential threat, causing the app not to connect to the internet.
You can verify if that’s the case by temporarily disabling your PC’s firewall.
- Open the Start menu, search for Windows Security, and select that app in the search results.
- Choose Firewall & network protection.
- Select the network type that says active.

- Toggle off the Microsoft Defender Firewall option.

- Select Yes in the User Account Control prompt.
If Outlook now connects to your email server, add the app to your firewall exclusion list.
Turn Off Outlook’s Add-Ins
Outlook supports external add-ins to allow you to get more out of this email client. Sometimes, one or more of these installed add-ons become corrupt or problematic, causing issues with your emails.
Your disconnected error may have resulted from a corrupt add-in. In this case, disable all your Outlook add-ins and enable one add-in at a time to find the culprit.
- Start Outlook and select File at the top-left corner.
- Choose Options from the sidebar on the left.
- Select Add-ins from the left sidebar and choose Go next to COM Add-ins on the right pane.

- Uncheck all add-ins and select OK.
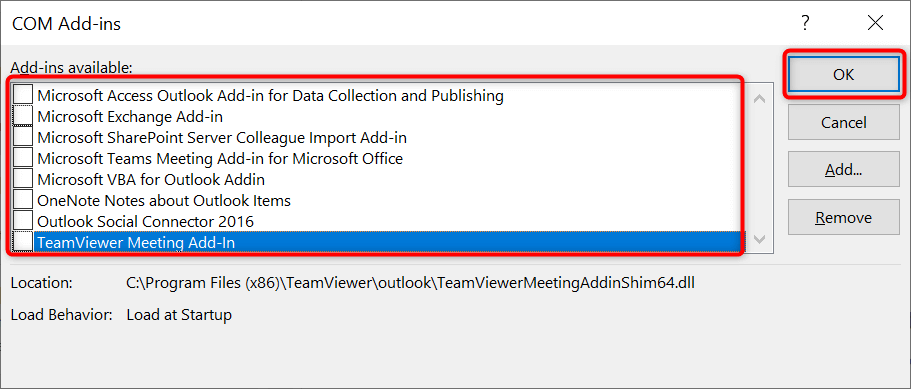
- Check if Outlook connects to your mail server. If it does, head back to the COM Add-ins box and enable one add-in. Keep doing this until Outlook stops connecting to your email server.
- You can delete the problematic add-in by choosing it on the list and selecting Remove.
Create and Use a New Outlook Profile
A corrupt Outlook profile can cause many issues with the app, including blocking the app’s internet connection. In this case, you can create a new profile and add your email account to it. This should resolve your disconnected error.
- Launch Outlook and select File > Info.
- Choose Account Settings > Manage Profiles on the right.
- Select Show Profiles followed by Add.
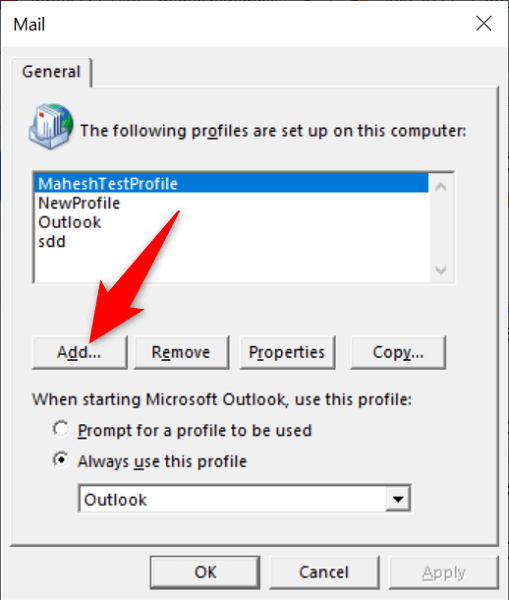
- Enter a name for your new profile in the Profile Name field and select OK.
- Add your email account to the newly created profile on the Add Account window.
- Select the Always use this profile drop-down menu and choose your newly created profile.
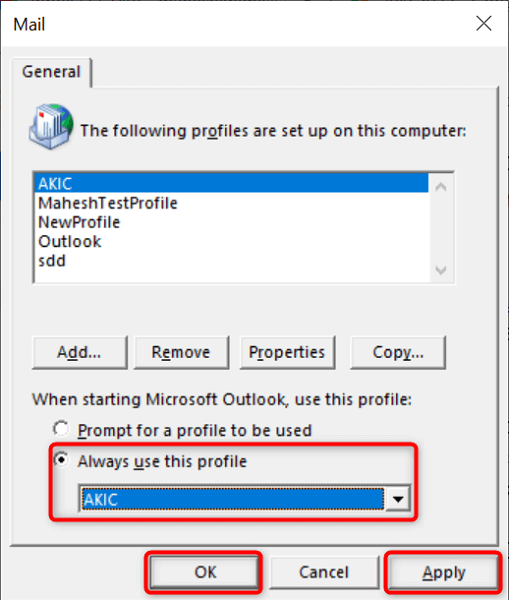
- Select Apply followed by OK.
- Quit and reopen Outlook.
Repair the Outlook Application
If Outlook’s disconnected error persists, the app’s core files might be problematic. One way to fix that is to use the Office repair tool to repair all your Office apps’ corrupt files.
This repair tool is included with your Outlook installation, so you don’t have to download or install it.
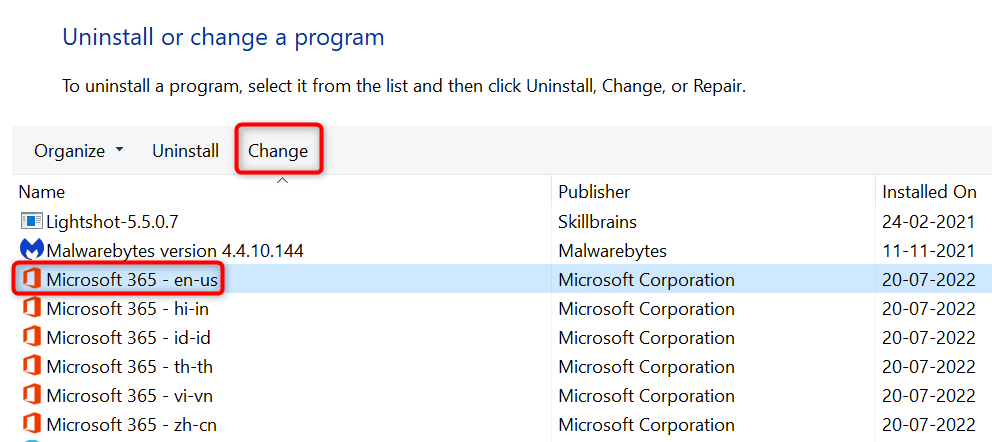
- Open Control Panel on your Windows PC.
- Select Uninstall a program.
- Choose your Office version on the list and select Change at the top.
- Select Yes in the User Account Control prompt.
- Enable the Quick Repair option and select Repair. Then, follow the on-screen instructions.

- If your problem persists, try the Online Repair option in the tool.
Connect a Disconnected Outlook App to Your Email Server
Your MS Outlook app fails to connect to your email server for many reasons. Once you’ve fixed those issues in the Outlook app as well as on your Windows PC, the app will establish a connection and allow you to send and receive emails.
We hope the guide helps you do that.
Source by helpdeskgeek.com


