Your Chromebook’s keyboard may fail to register keyboard input if it’s dirty or water-damaged. Problems with your Chromebook’s operating system can also cause occasional keyboard failures.
This article covers different fixes that may help get your Chromebook keyboard working correctly again. Some troubleshooting solutions in this tutorial require an external keyboard. So, connect an external keyboard to your Chromebook if you have one. That’ll help you run troubleshooting fixes that may require keyboard shortcuts or keypresses.

You could also activate and use your Chromebook’s on-screen keyboard while you try to fix problems with the physical keyboard.
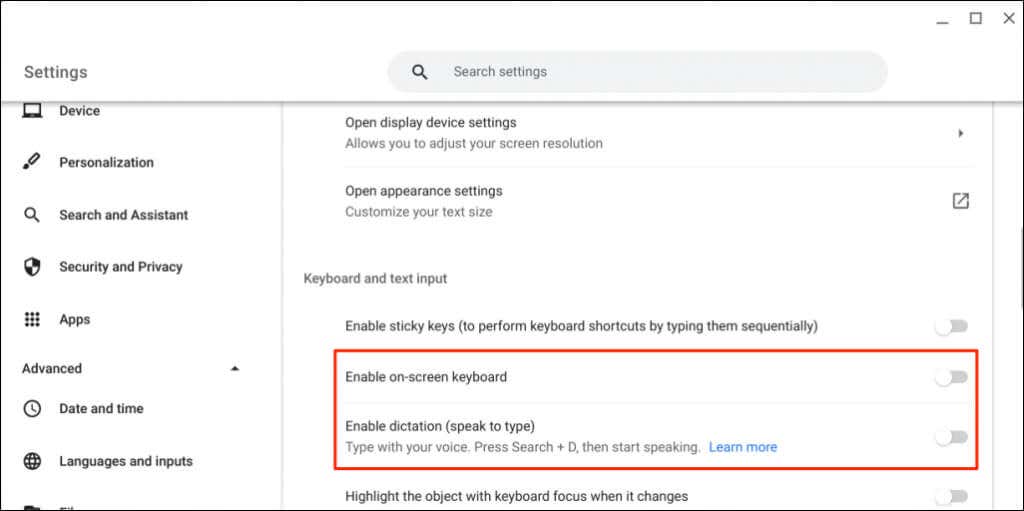
- Head to Settings > Advanced > Accessibility > Manage accessibility features and toggle on Enable on-screen keyboard.
- Turn on Enable dictation (speak to type) to type using voice input or dictation.
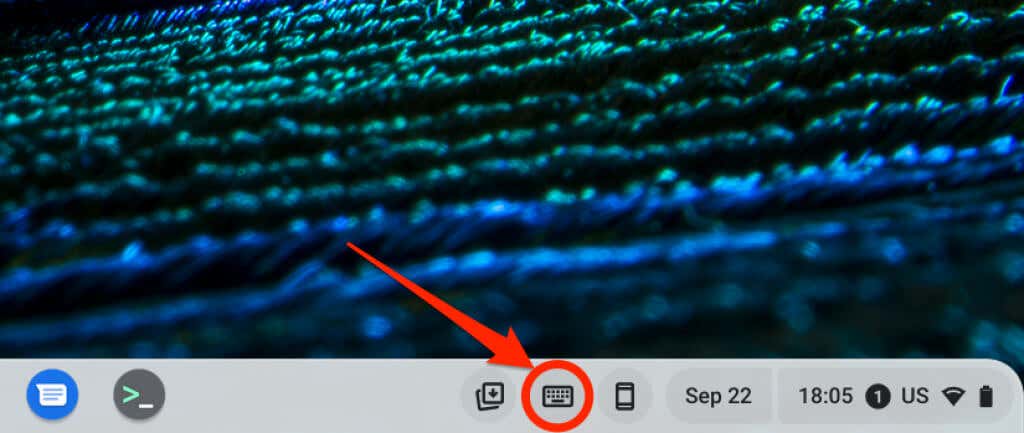
- Select the keyboard icon in the bottom right corner of your Chromebook screen to launch the on-screen keyboard.
1. Reboot Your Chromebook
Turning your Chromebook off and back on can fix problems with the keyboard.
- Select the time in the bottom-right corner of the screen to open the ChromeOS status tray.
- Select the Power icon, and wait 10-30 seconds for your Chromebook to shut down.
- Press the Power button to turn on your Chromebook and check if the keyboard or affected keys now work.
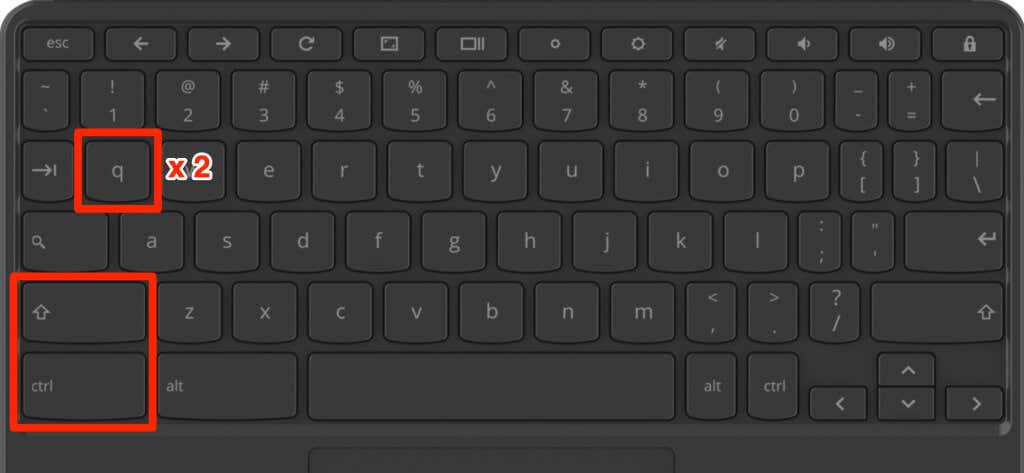
If you use an external keyboard, press the Power + Refresh buttons simultaneously to reboot your Chromebook. Alternatively, hold the Ctrl + Shift + Q + Q keys (press the Q key twice).
2. Use Another Account
Problems with your Chromebook user account can cause keyboard issues. Using your Chromebook in guest mode can help determine if your account’s responsible for the keyboard malfunction.
- Reboot your Chromebook and select Browse as Guest in the bottom corner of the log-in screen.
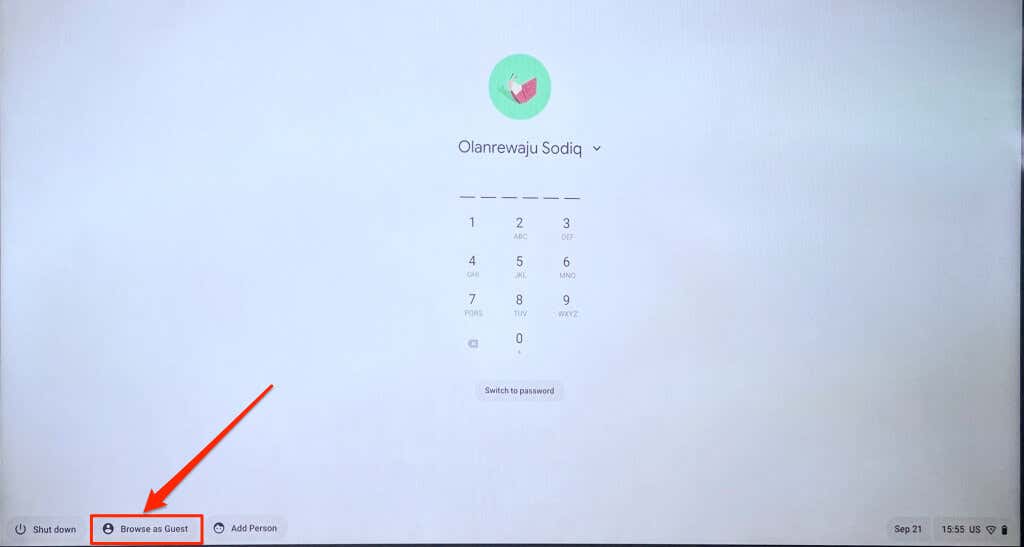
Note: You may not find the “Browse as Guest” option on your work or school Chromebook. If you can’t switch to another account, report the keyboard malfunction to your device administrator.
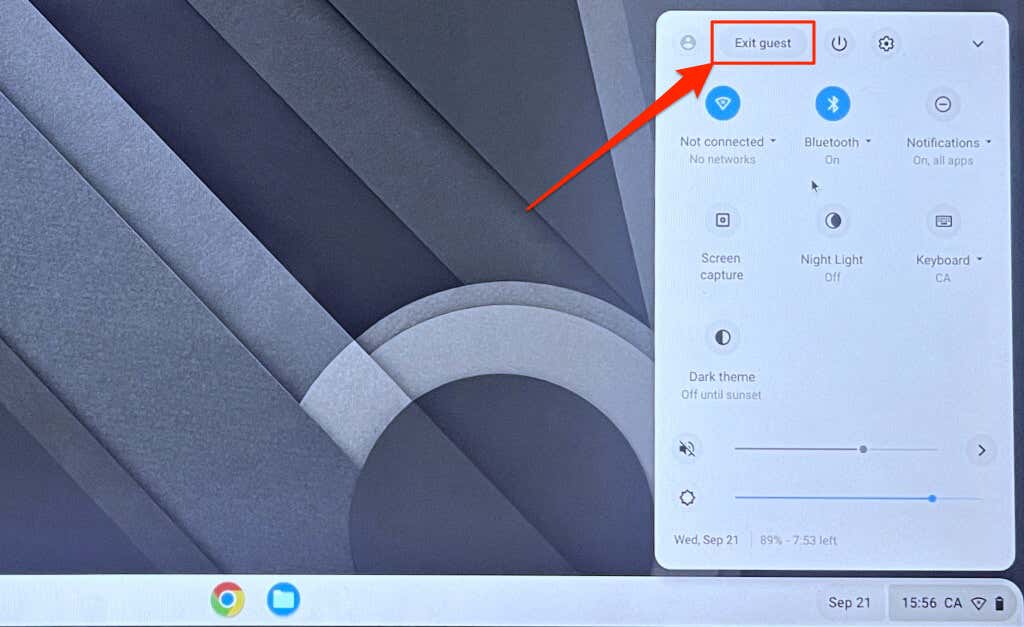
- Exit guest mode and try the fixes below if your keyboard still doesn’t work. Open the status tray and select Exit guest.
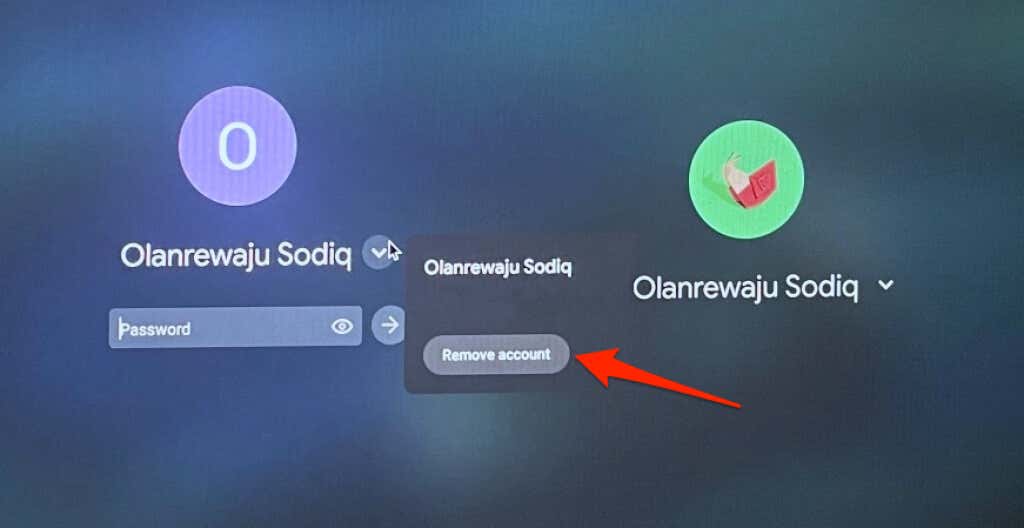
If your keyboard works in guest mode, delete the user account exhibiting the problem and create a new one. Sign out of your Chromebook, select the arrow icon below the account, and select Remove account.
3. Update Your Chromebook
Occasionally, software bugs in your Chromebook’s operating system can also cause a keyboard glitch. Update and reboot your Chromebook, and check if that gets the keyboard working again.
- Connect your Chromebook to a Wi-Fi network and open the Settings app.
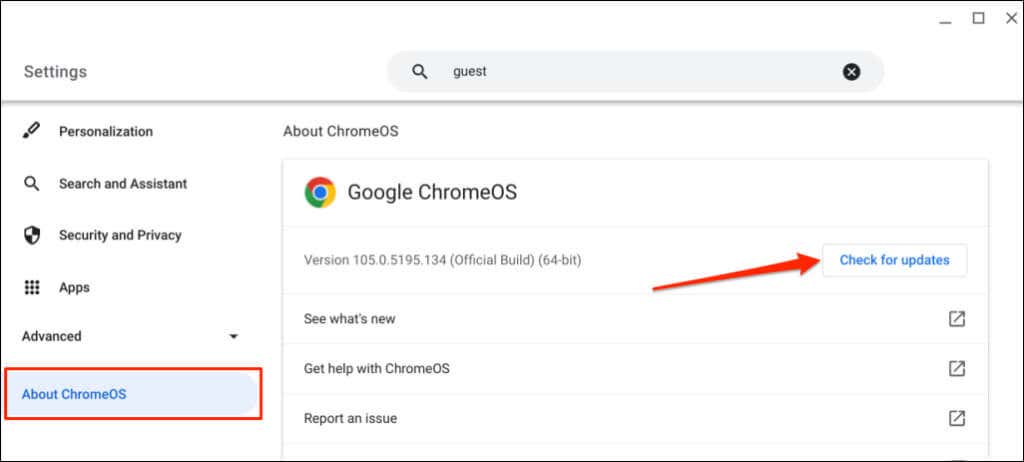
- Select About ChromeOS on the sidebar.
- Select Check for updates.
4. Enable Auto-Repeat
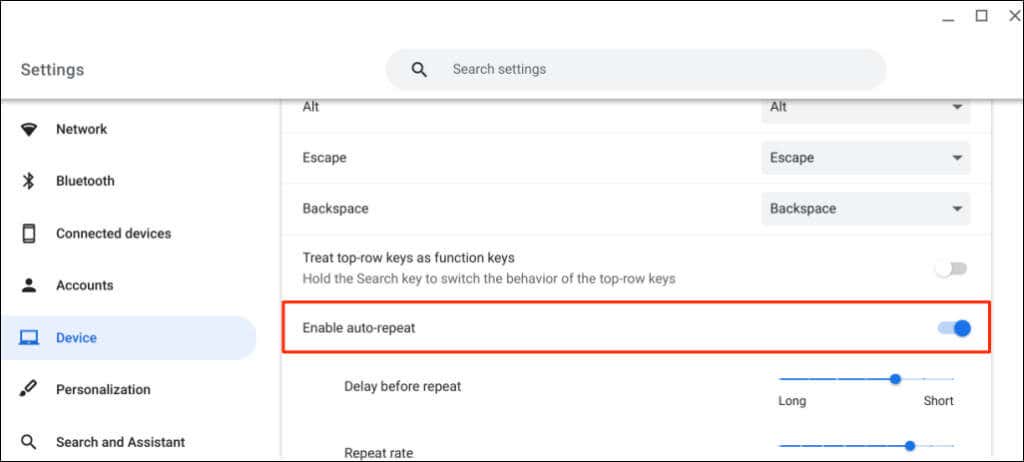
When typing, your Chromebook should enter a character multiple times when you hold its corresponding key. Turn on the “Enable auto-repeat” feature if your Chromebook doesn’t repeat characters.
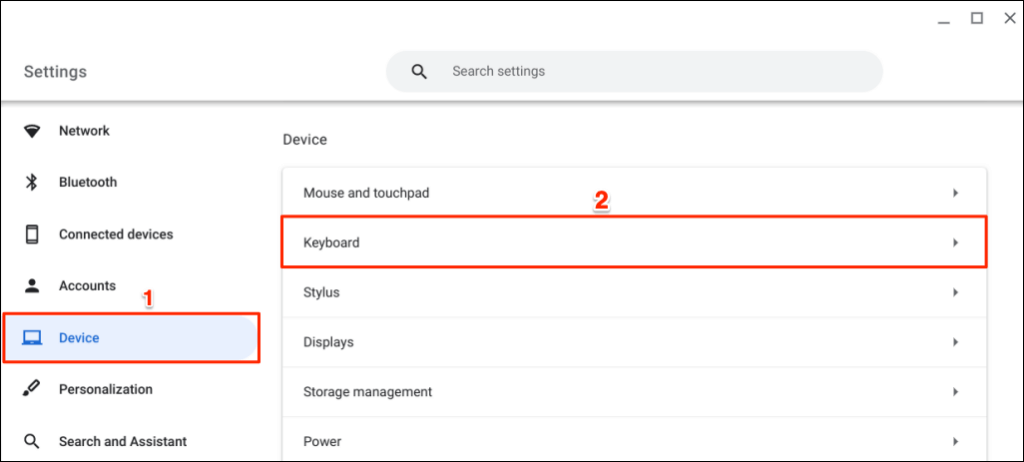
- Open Settings, select Device on the sidebar, and select Keyboard.
- Turn on Enable auto-repeat and set the “Delay before repeat” and “Repeat rate” to your preference.
5. Disable Function Keys
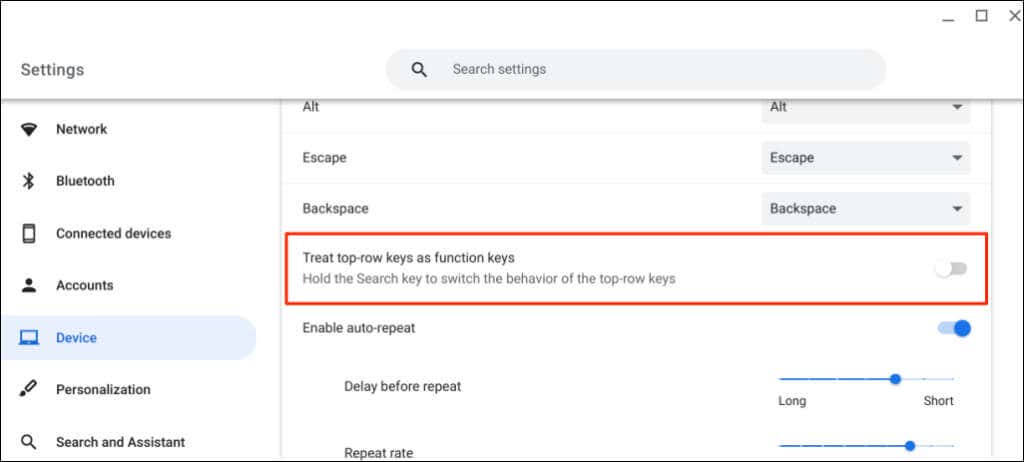
Your keyboard’s top-row keys (brightness, volume, screenshot, etc.) won’t perform their unique actions if ChromeOS treats them as function keys.
- Go to Settings > Device > Keyboard.
- Toggle off Treat top-row keys as function keys.
6. Change Keyboard Input Method
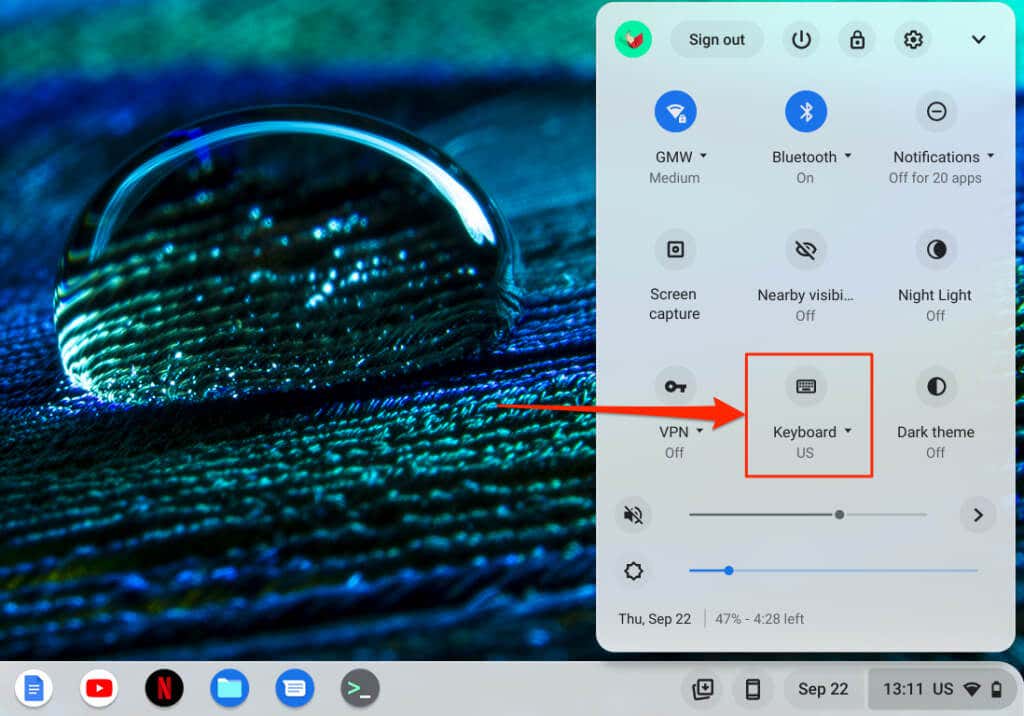
Your Chromebook may display characters different from what’s on the keyboard if you’re using the wrong keyboard layout/language. If your Chromebook types wrong letters, switch the input method in the keyboard settings menu and try again.
- Open your Chromebook’s status tray, select Keyboard, and choose an input method that matches your language or region.
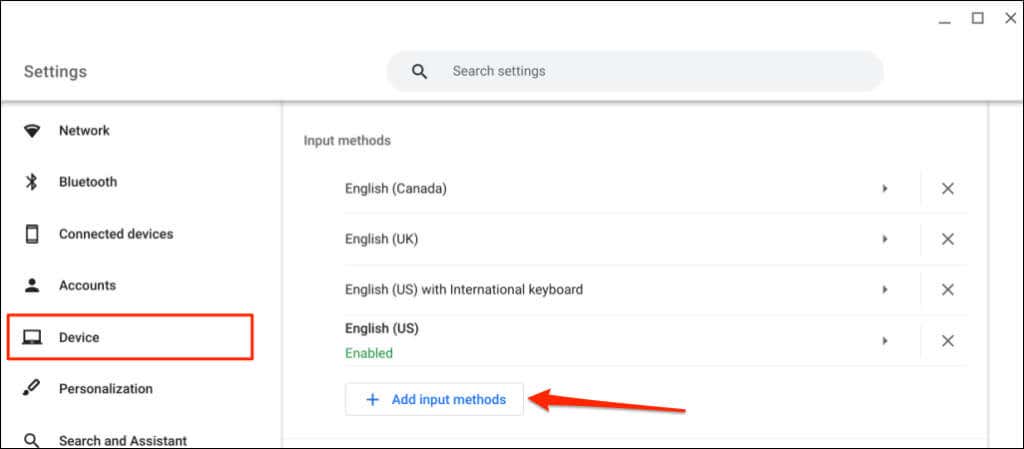
- If you don’t find your preferred input in the status tray, go to Settings > Device and select Change input settings.
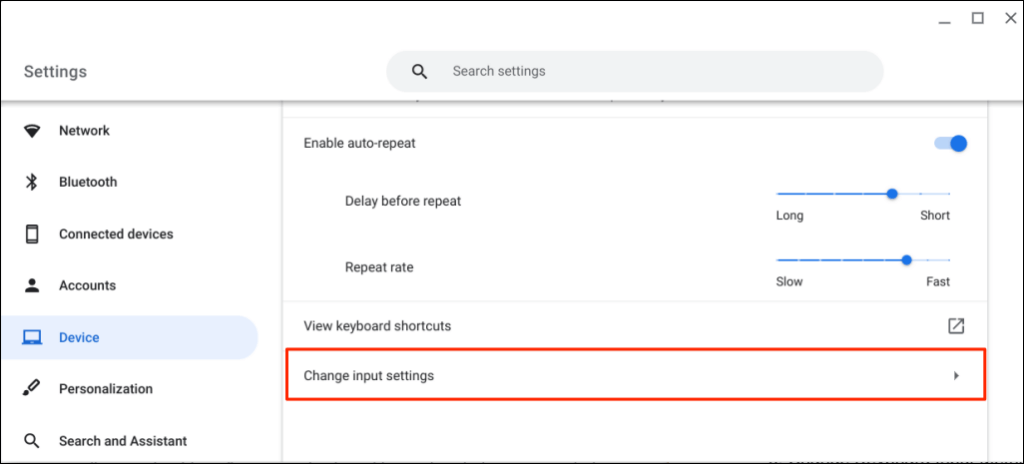
- Select Add input methods, choose your preferred input language, and select Add.
7. Review the Functions of Special Keys
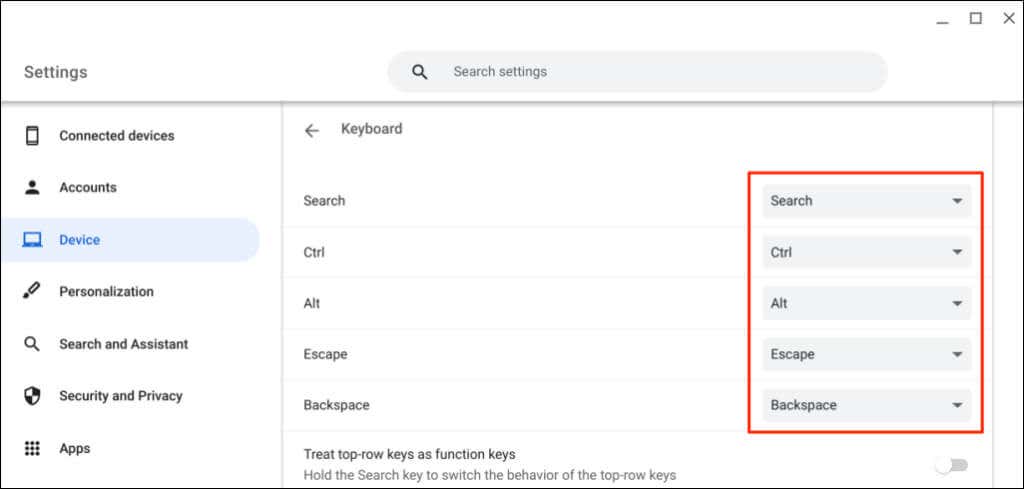
If the Esc, Backspace, Ctrl, Search, or Alt keys aren’t working, ensure the keys are assigned the correct functions.
Go to Settings > Device > Keyboard and review the functions of the special keys.
8. Fix Stuck or Jammed Keys
Some keys can get stuck if dirt, debris, liquid, and other tiny particles get into the keyboard. These particles may cause your device to repeat keyboard input when you press a key once. Sometimes, your Chromebook won’t detect input from stuck keys.

Shut down your Chromebook, turn the keyboard face down, and gently pat the back of the keyboard. Afterward, run your fingers across the keyboard to release the stuck/jammed keys.
You can also clean your keyboard with compressed air. Turn off your Chromebook, hold it at a 75-degree angle, and use compressed to spray the keyboard or affected keys. Rotate your Chromebook and respray the keyboard at a different angle.
If you spilled water on the keyboard, refer to our tutorial on fixing a water-damaged keyboard. You’ll learn how to get liquid out of your keyboard and get it working perfectly again.
9. Reset Your Chromebook Hardware
Performing a hardware reset (or “Embedded Controller (EC) reset) could fix problems with your Chromebook’s keyboard and touchpad.
Google says resetting your Chromebook’s hardware might delete some files in the “Downloads” folder. However, it doesn’t specify the exact files that might be affected.
Note: Unplug external devices and accessories (mouse, monitor, USB drive, etc.) from your Chromebook before resetting its hardware.
Reset a Chromebook Laptop’s Hardware
- Power off your Chromebook and wait 10-30 seconds until it shuts down.
- Press and hold the Refresh + Power buttons for 10 seconds.
- Release the Refresh key first and let go of the Power button when your Chromebook starts up.
Reset a 2-in-1 Chromebook Hardware

If your 2-in-1 Chromebook doubles as a tablet, detach the keyboard and follow the steps below to reset its hardware.
- Press the Volume Up and Power keys for at least 10 seconds.
- Release both buttons when your Chromebook boots up.
Hard Reset Chromebooks with Removable Batteries
You can hard reset some Chromebooks by removing and re-inserting their batteries. If your Chromebook battery’s detachable, shut it down, and remove the battery. Reconnect the battery and turn on your Chromebook.
Other Ways to EC Reset Your Chromebook Hardware
Some Chromebook models from Samsung, Acer, Asus, and Lenovo have special hardware reset buttons. You’ll typically find the button hidden in a hole on the bottom of such Chromebook models.
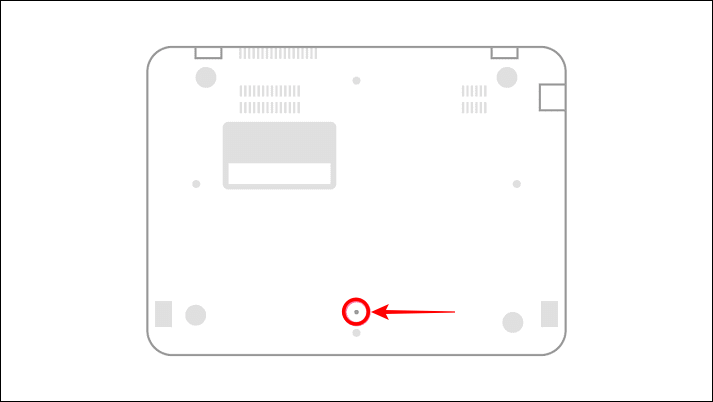
Contact your Chromebook manufacturer or refer to its instruction manual to get help locating the hardware reset button.
- Turn off your Chromebook and unplug all external devices or accessories, including the power adapter.
- Insert a plastic paperclip in the hole to reach the reset button.
- Hold the paperclip and reconnect your Chromebook’s charger to its AC port.
- Power on your Chromebook, remove the paperclip and check if the hard reset fixes the keyboard.
10. Factory Reset Your Chromebook
Restore your Chromebook to factory default if the keyboard problem remains persistent. A factory reset will uninstall and delete everything on your Chromebook—apps, local files, browser extensions, etc. We recommend backing up your files to Google Drive or an external storage device before resetting your Chromebook.
Reset Chromebook From the Settings Menu
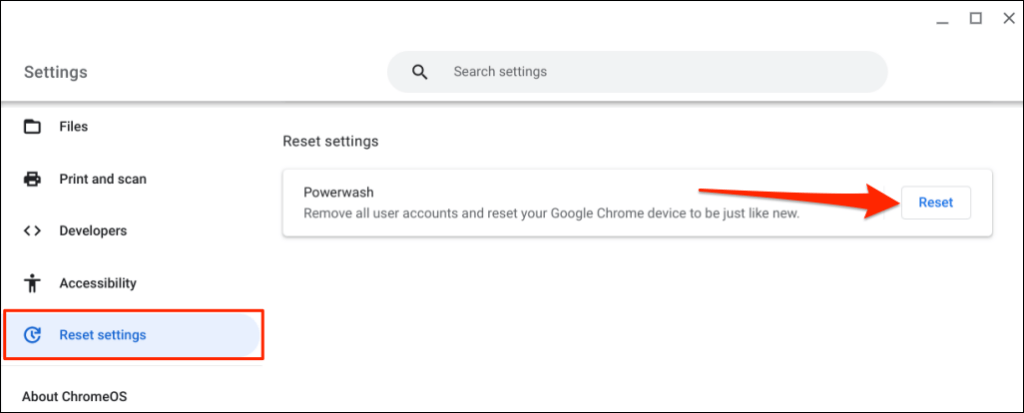
- Go to Settings > Reset settings.
- Select Reset in the “Powerwash” row.
Reset Chromebook Using Keyboard Shortcut
Since your Chromebook’s built-in keyboard isn’t working, you’ll need an external keyboard to perform a factory reset. Plug a USB keyboard into your Chromebook and follow the steps below.
- Open the Chromebook’s status tray and select Sign Out.
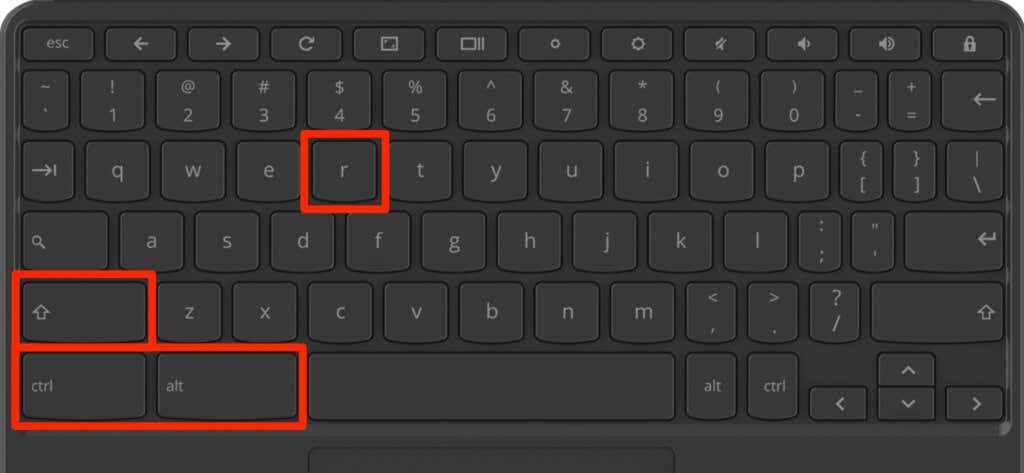
- Press and hold the Ctrl + Alt + Shift + R keys.
- Select Restart.
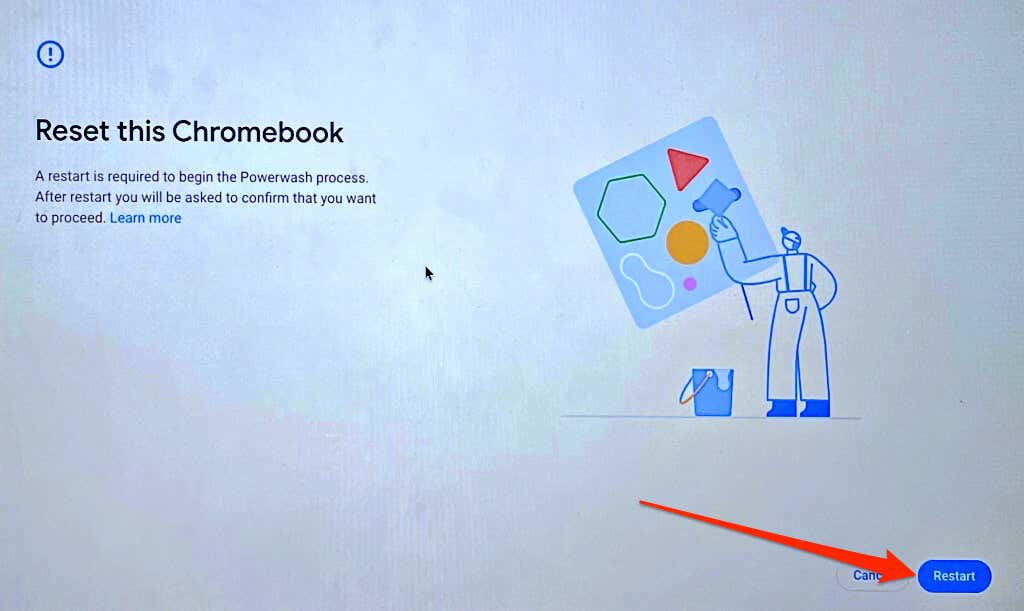
- Select Powerwash on the next screen, select Continue, and follow the on-screen instructions to proceed.
Use an On-Screen Keyboard
Your keyboard’s likely damaged if the issue persists after trying these fixes. Contact your Chromebook manufacturer or visit a nearby computer technician to have your device checked for hardware damage.
Source by helpdeskgeek.com


